IBM Cloud 快速入门
参照以下说明,在 IBM Cloud 上安装和运行 Istio。你可以选择安装在 IBM 公有云或 IBM 私有云上.
IBM 公有云
在 IBM 公有云中,使用 Helm 和 IBM Cloud Kubernetes Service 安装和运行 Istio。
本指南将安装 Istio 的当前发布版本。
前置条件 - IBM 公有云
- 安装 IBM Cloud CLI,IBM Cloud Kubernetes Service 插件,以及 Kubernetes CLI。Istio 需要 Kubernetes 1.9 版本及更新的版本。确保安装的
kubectlCLI 版本与集群中 Kubernetes 版本一致。 - 确保 Kubernetes 集群的版本是 1.9 或之后的版本。如果你还没有一个可用的集群,创建一个 1.9 版本或更新版本的集群。
- 通过执行
ibmcloud ks cluster-config <cluster_name_or_ID>将 CLI 指向你的集群,然后对输出的命令进行拷贝粘贴。
初始化 Helm 和 Tiller
安装 Helm CLI。
在
kube-systemnamespace 为 Tiller 创建一个 Service account,以及一个与 podtiller-deploy绑定的 Kubernetes RBAC 集群角色:apiVersion: v1 kind: ServiceAccount namespace: kube-system --- apiVersion: rbac.authorization.k8s.io/v1 kind: ClusterRoleBinding metadata: name: tiller roleRef: apiGroup: rbac.authorization.k8s.io kind: ClusterRole name: cluster-admin subjects: - kind: ServiceAccount name: tiller namespace: kube-system执行创建 Service account 并绑定集群角色:
$ kubectl create -f rbac-config.yaml初始化 Helm 并安装 Tiller:
$ helm init --service-account tiller将 IBM Cloud 的 Helm 仓库地址添加到你的 Helm 实例:
$ helm repo add ibm-charts https://registry.bluemix.net/helm/ibm-charts
部署 Istio Helm chart
如果使用 2.10.0 之前的 Helm 版本,请通过
kubectl apply命令安装 Istio 的 CRD,并等待几秒钟:$ kubectl apply -f https://raw.githubusercontent.com/IBM/charts/master/stable/ibm-istio/templates/crds.yaml在你的集群中安装 Helm chart:
$ helm install ibm-charts/ibm-istio --name=istio --namespace istio-system确保 Istio 的 9 个 Pod 和 Prometheus 的 pod 已经完全部署好:
$ kubectl get pods -n istio-system
NAME                                       READY     STATUS      RESTARTS   AGE
istio-citadel-748d656b-pj9bw               1/1       Running     0          2m
istio-egressgateway-6c65d7c98d-l54kg       1/1       Running     0          2m
istio-galley-65cfbc6fd7-bpnqx              1/1       Running     0          2m
istio-ingressgateway-f8dd85989-6w6nj       1/1       Running     0          2m
istio-pilot-5fd885964b-l4df6               2/2       Running     0          2m
istio-policy-56f4f4cbbd-2z2bk              2/2       Running     0          2m
istio-sidecar-injector-646655c8cd-rwvsx    1/1       Running     0          2m
istio-statsd-prom-bridge-7fdbbf769-8k42l   1/1       Running     0          2m
istio-telemetry-8687d9d745-mwjbf           2/2       Running     0          2m
prometheus-55c7c698d6-f4drj                1/1       Running     0          2m
升级
将你的 Istio Helm chart 升级到最新版本:
$ helm upgrade -f config.yaml istio ibm/ibm-istio
卸载 Istio
卸载 Istio 的 Helm 部署:
$ helm del istio --purge如果你的 Helm 版本低于 2.9.0,那么在重新部署新版本的 Istio Chart 之前,您需要手动清理额外的 Job 资源:
$ kubectl -n istio-system delete job --all如果需要,删除 Istio CRD:
$ kubectl delete -f https://raw.githubusercontent.com/IBM/charts/master/stable/ibm-istio/templates/crds.yaml
IBM 私有云
使用 Catalog 模块在 IBM 私有云安装和运行 Istio。
本指南将安装 Istio 的当前发布版本。
前置条件 - IBM 私有云
- 你需要有一个可用的 IBM 私有云集群。否则,你可以参照安装 IBM 私有云的指引创建一个 IBM 私有云集群。
使用 Catalog 模块部署 Istio
- 登录到 IBM 私有云 控制台。
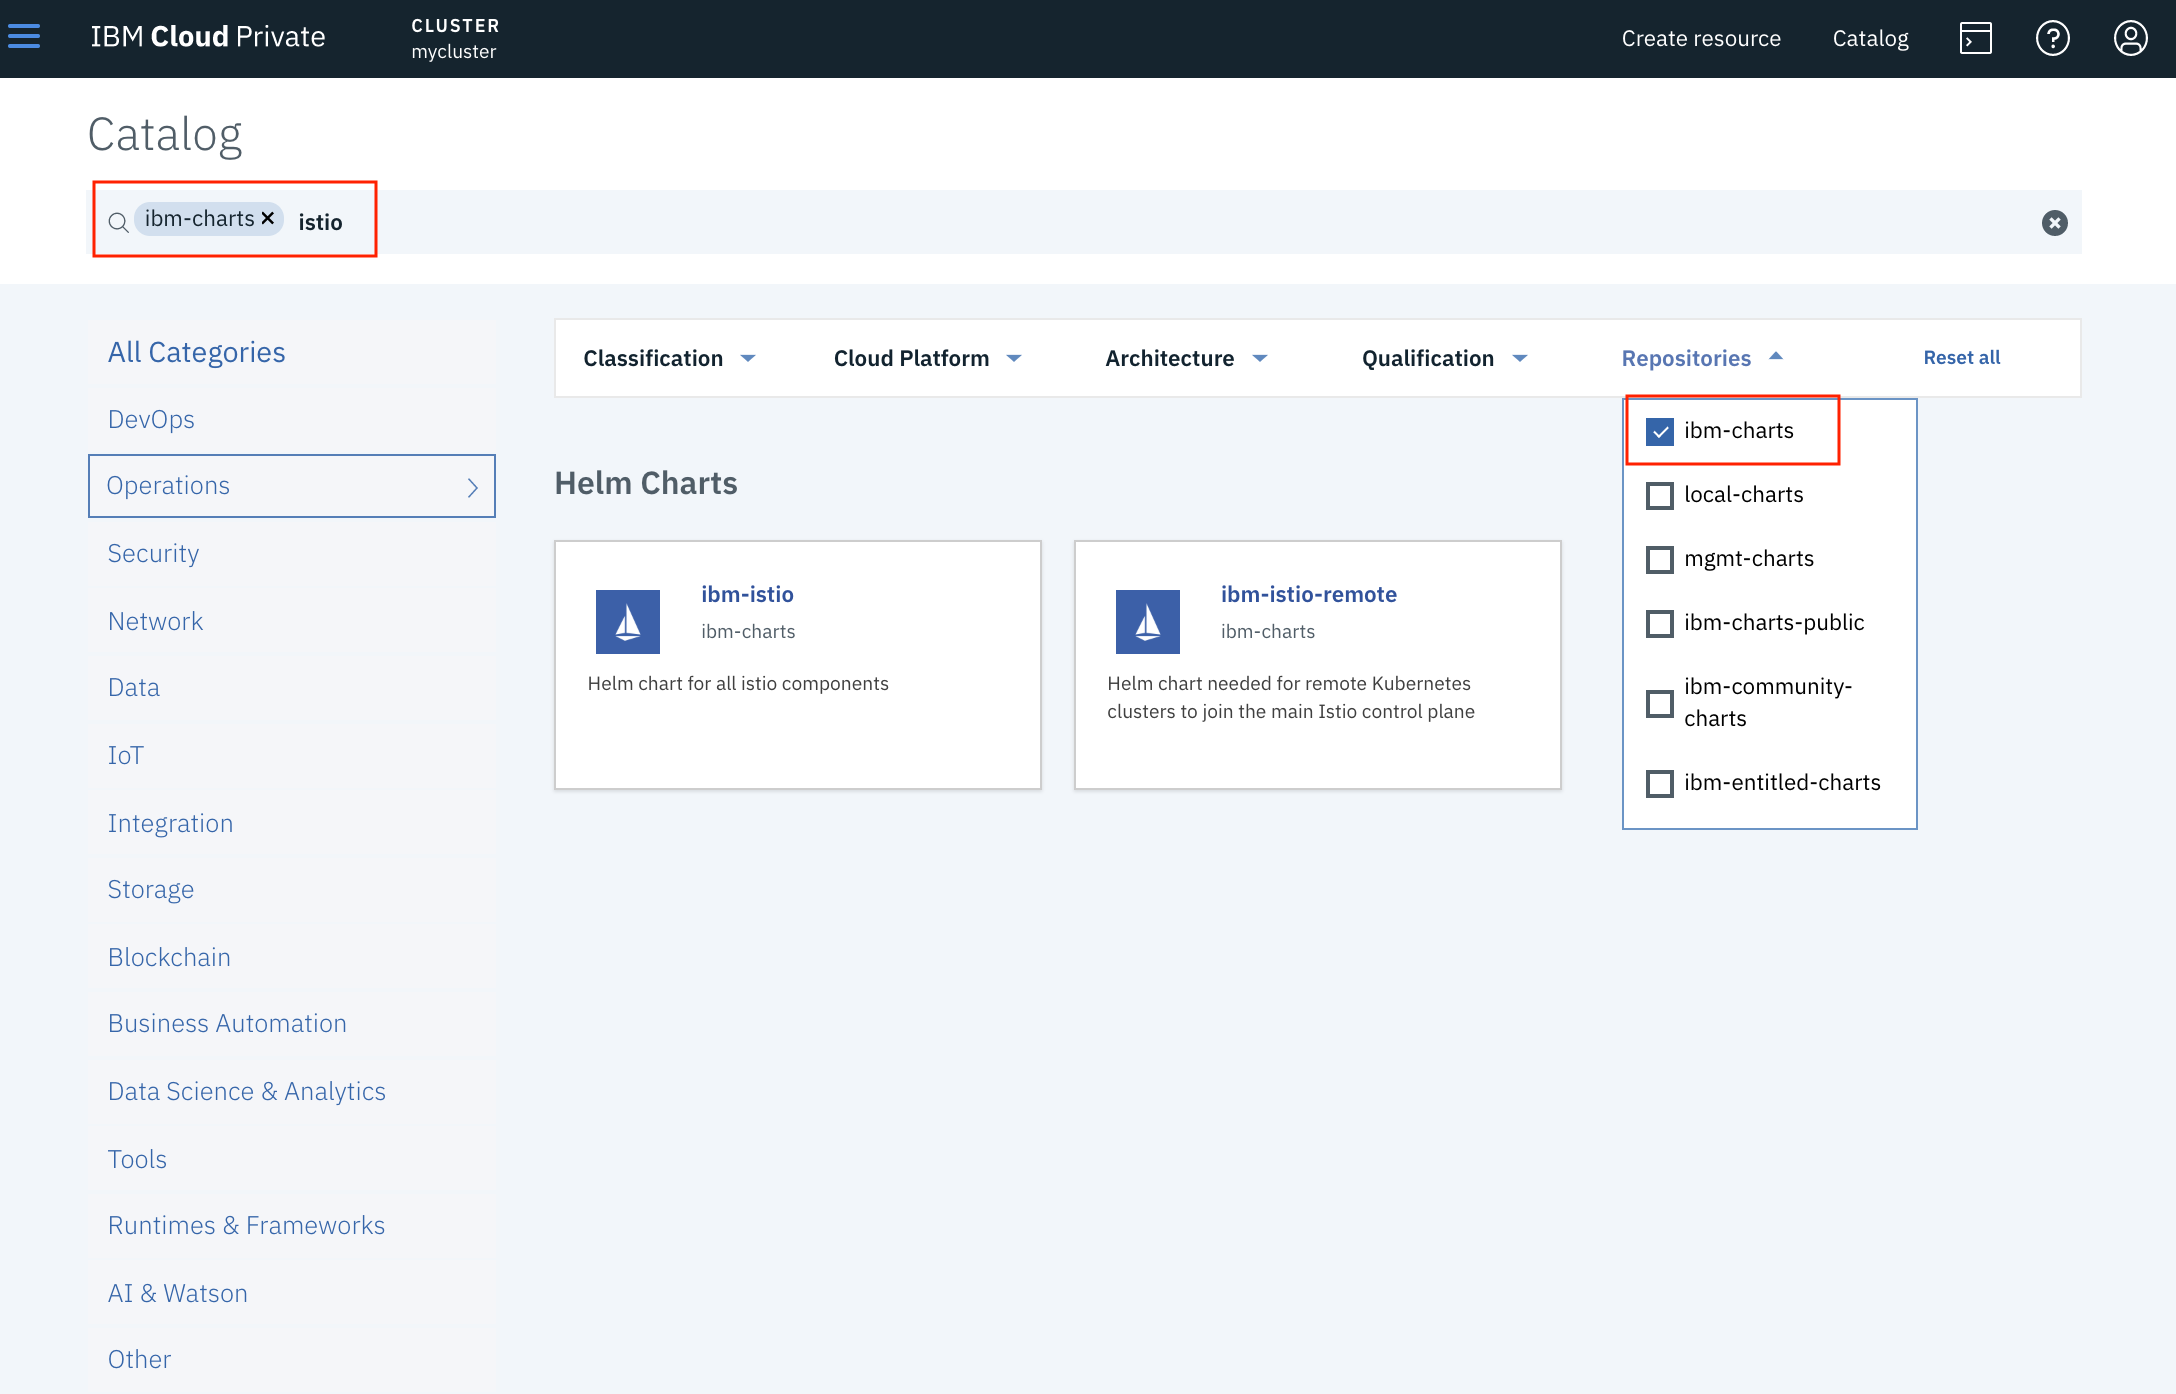
- 点击导航栏右侧的
Catalog。 - 点击搜索框右侧的
Filter并选中ibm-charts复选框。 - 点击左侧导航窗格的
Operations。
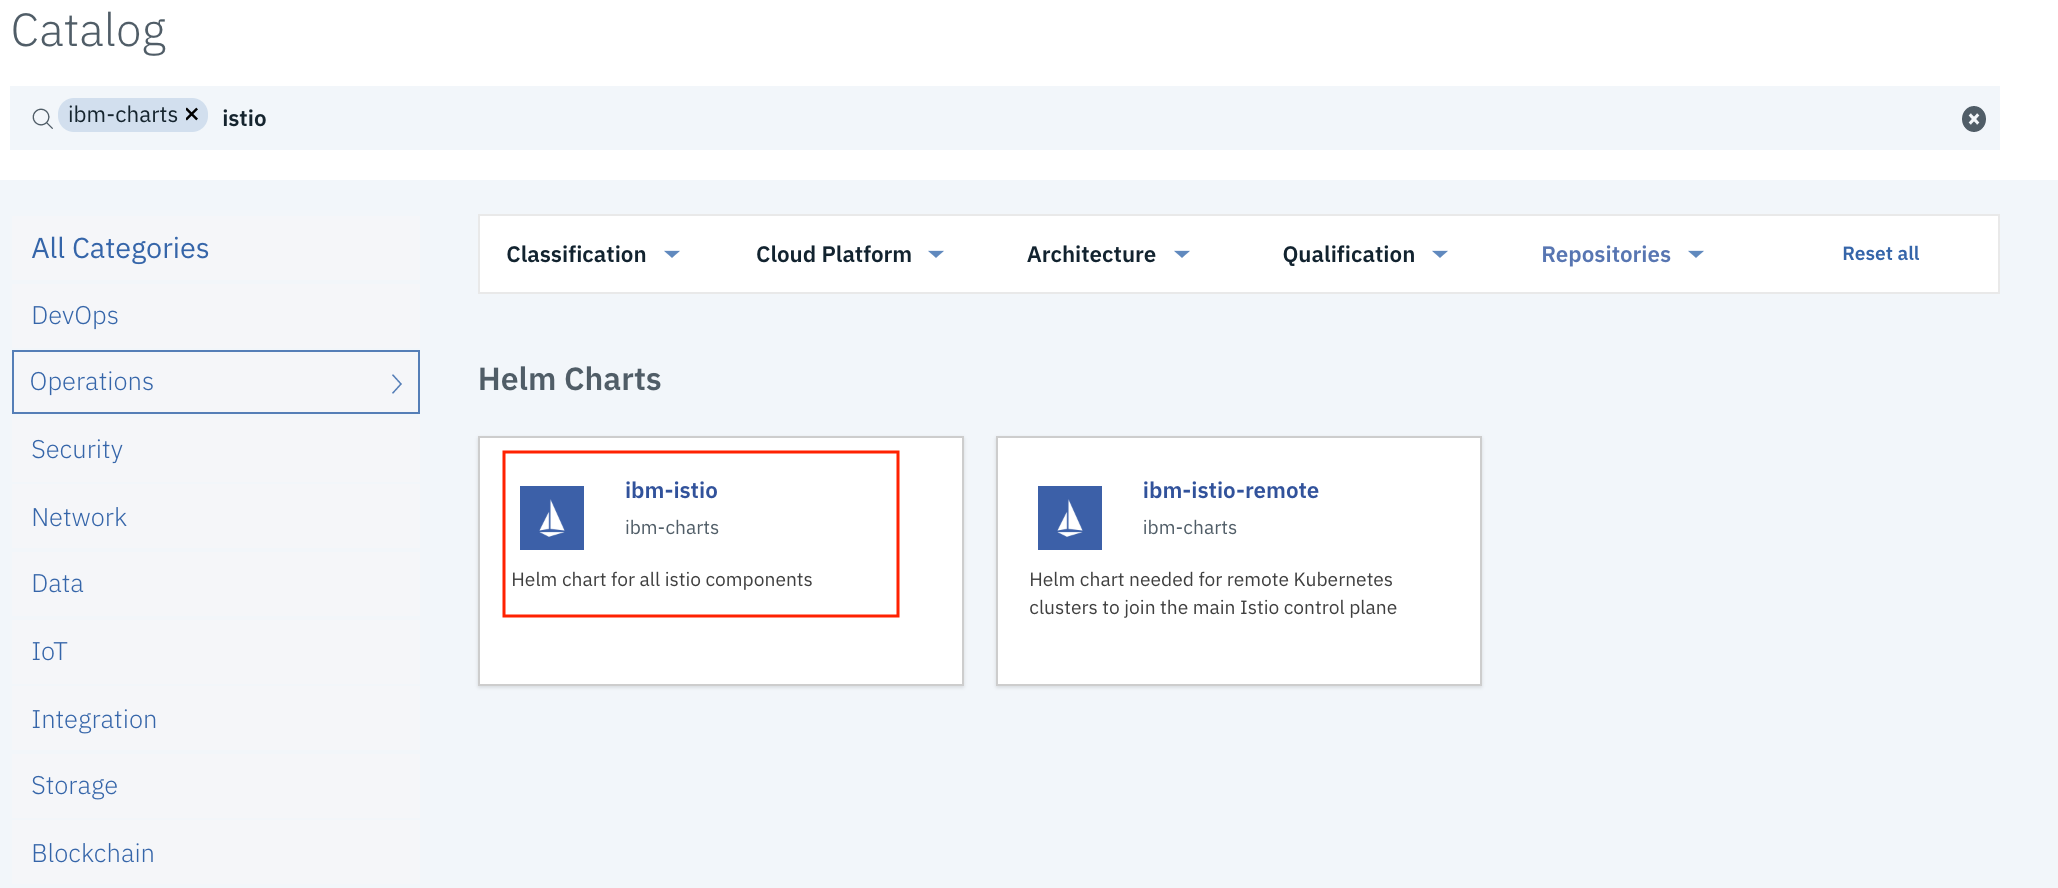
- 点击右侧面板中的
ibm-istio。
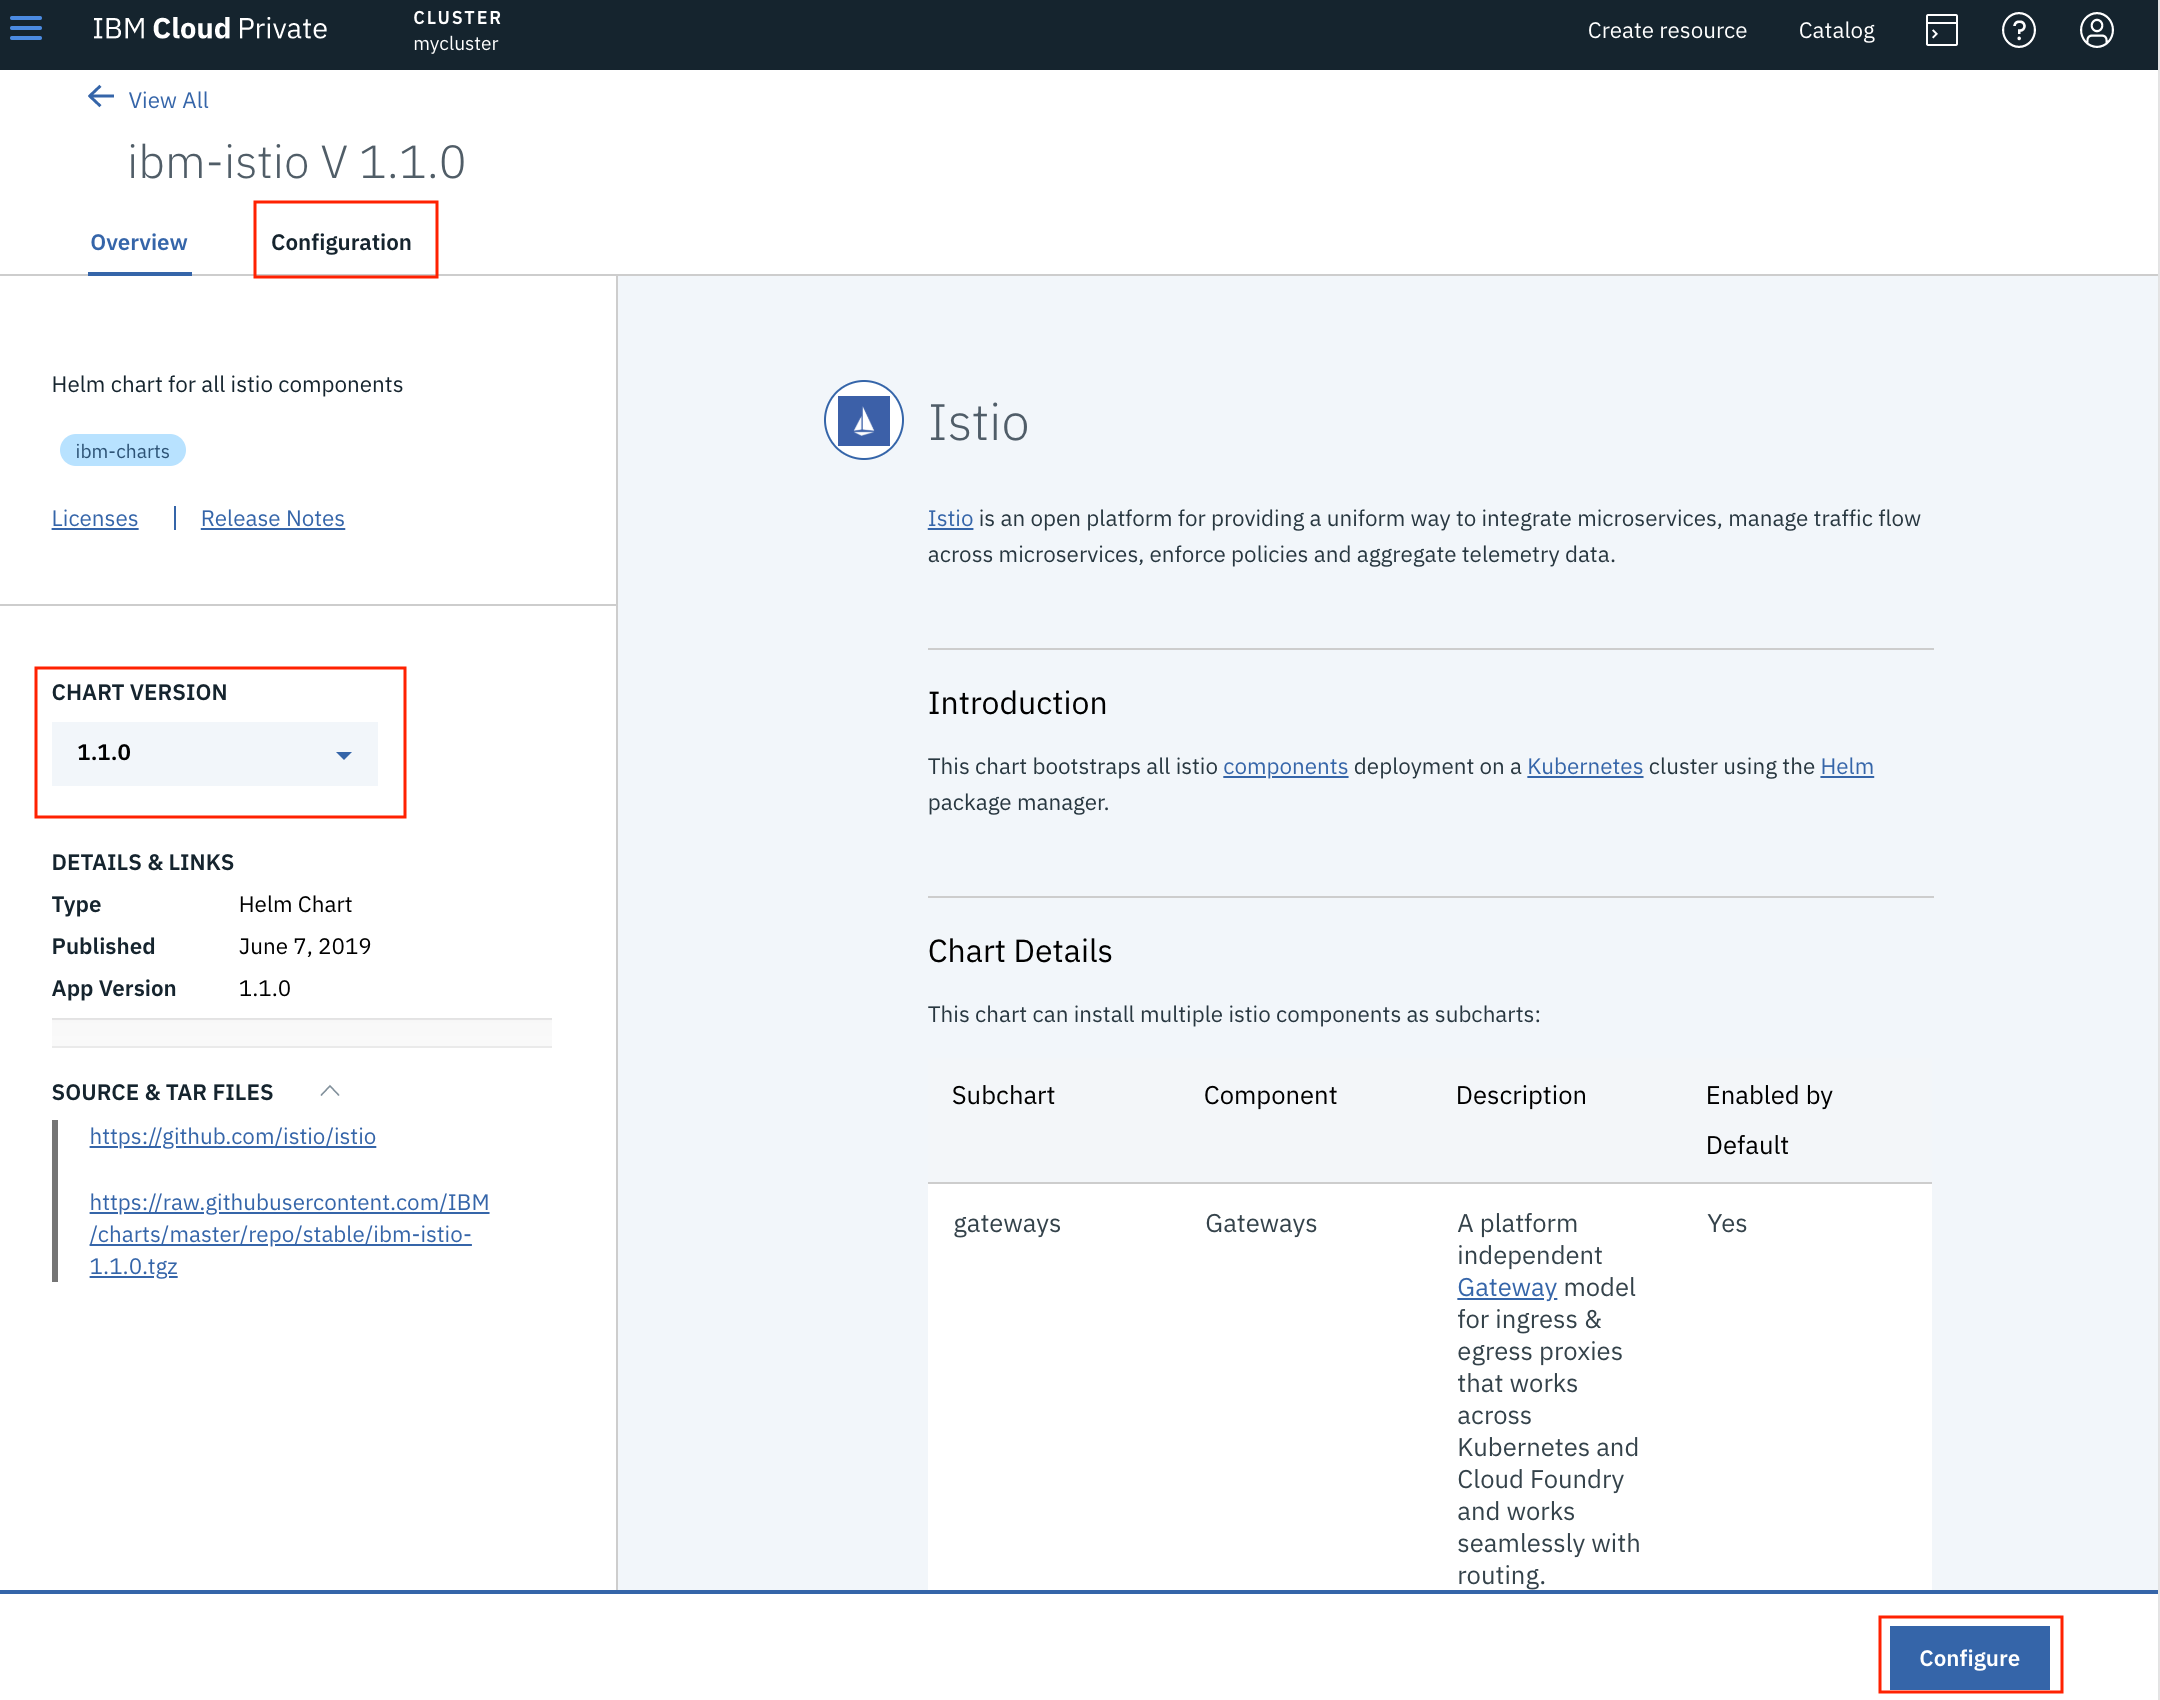
- (可选的)使用
CHART VERSION的下拉功能修改 Istio 版本。 - 点击
Configure按钮。
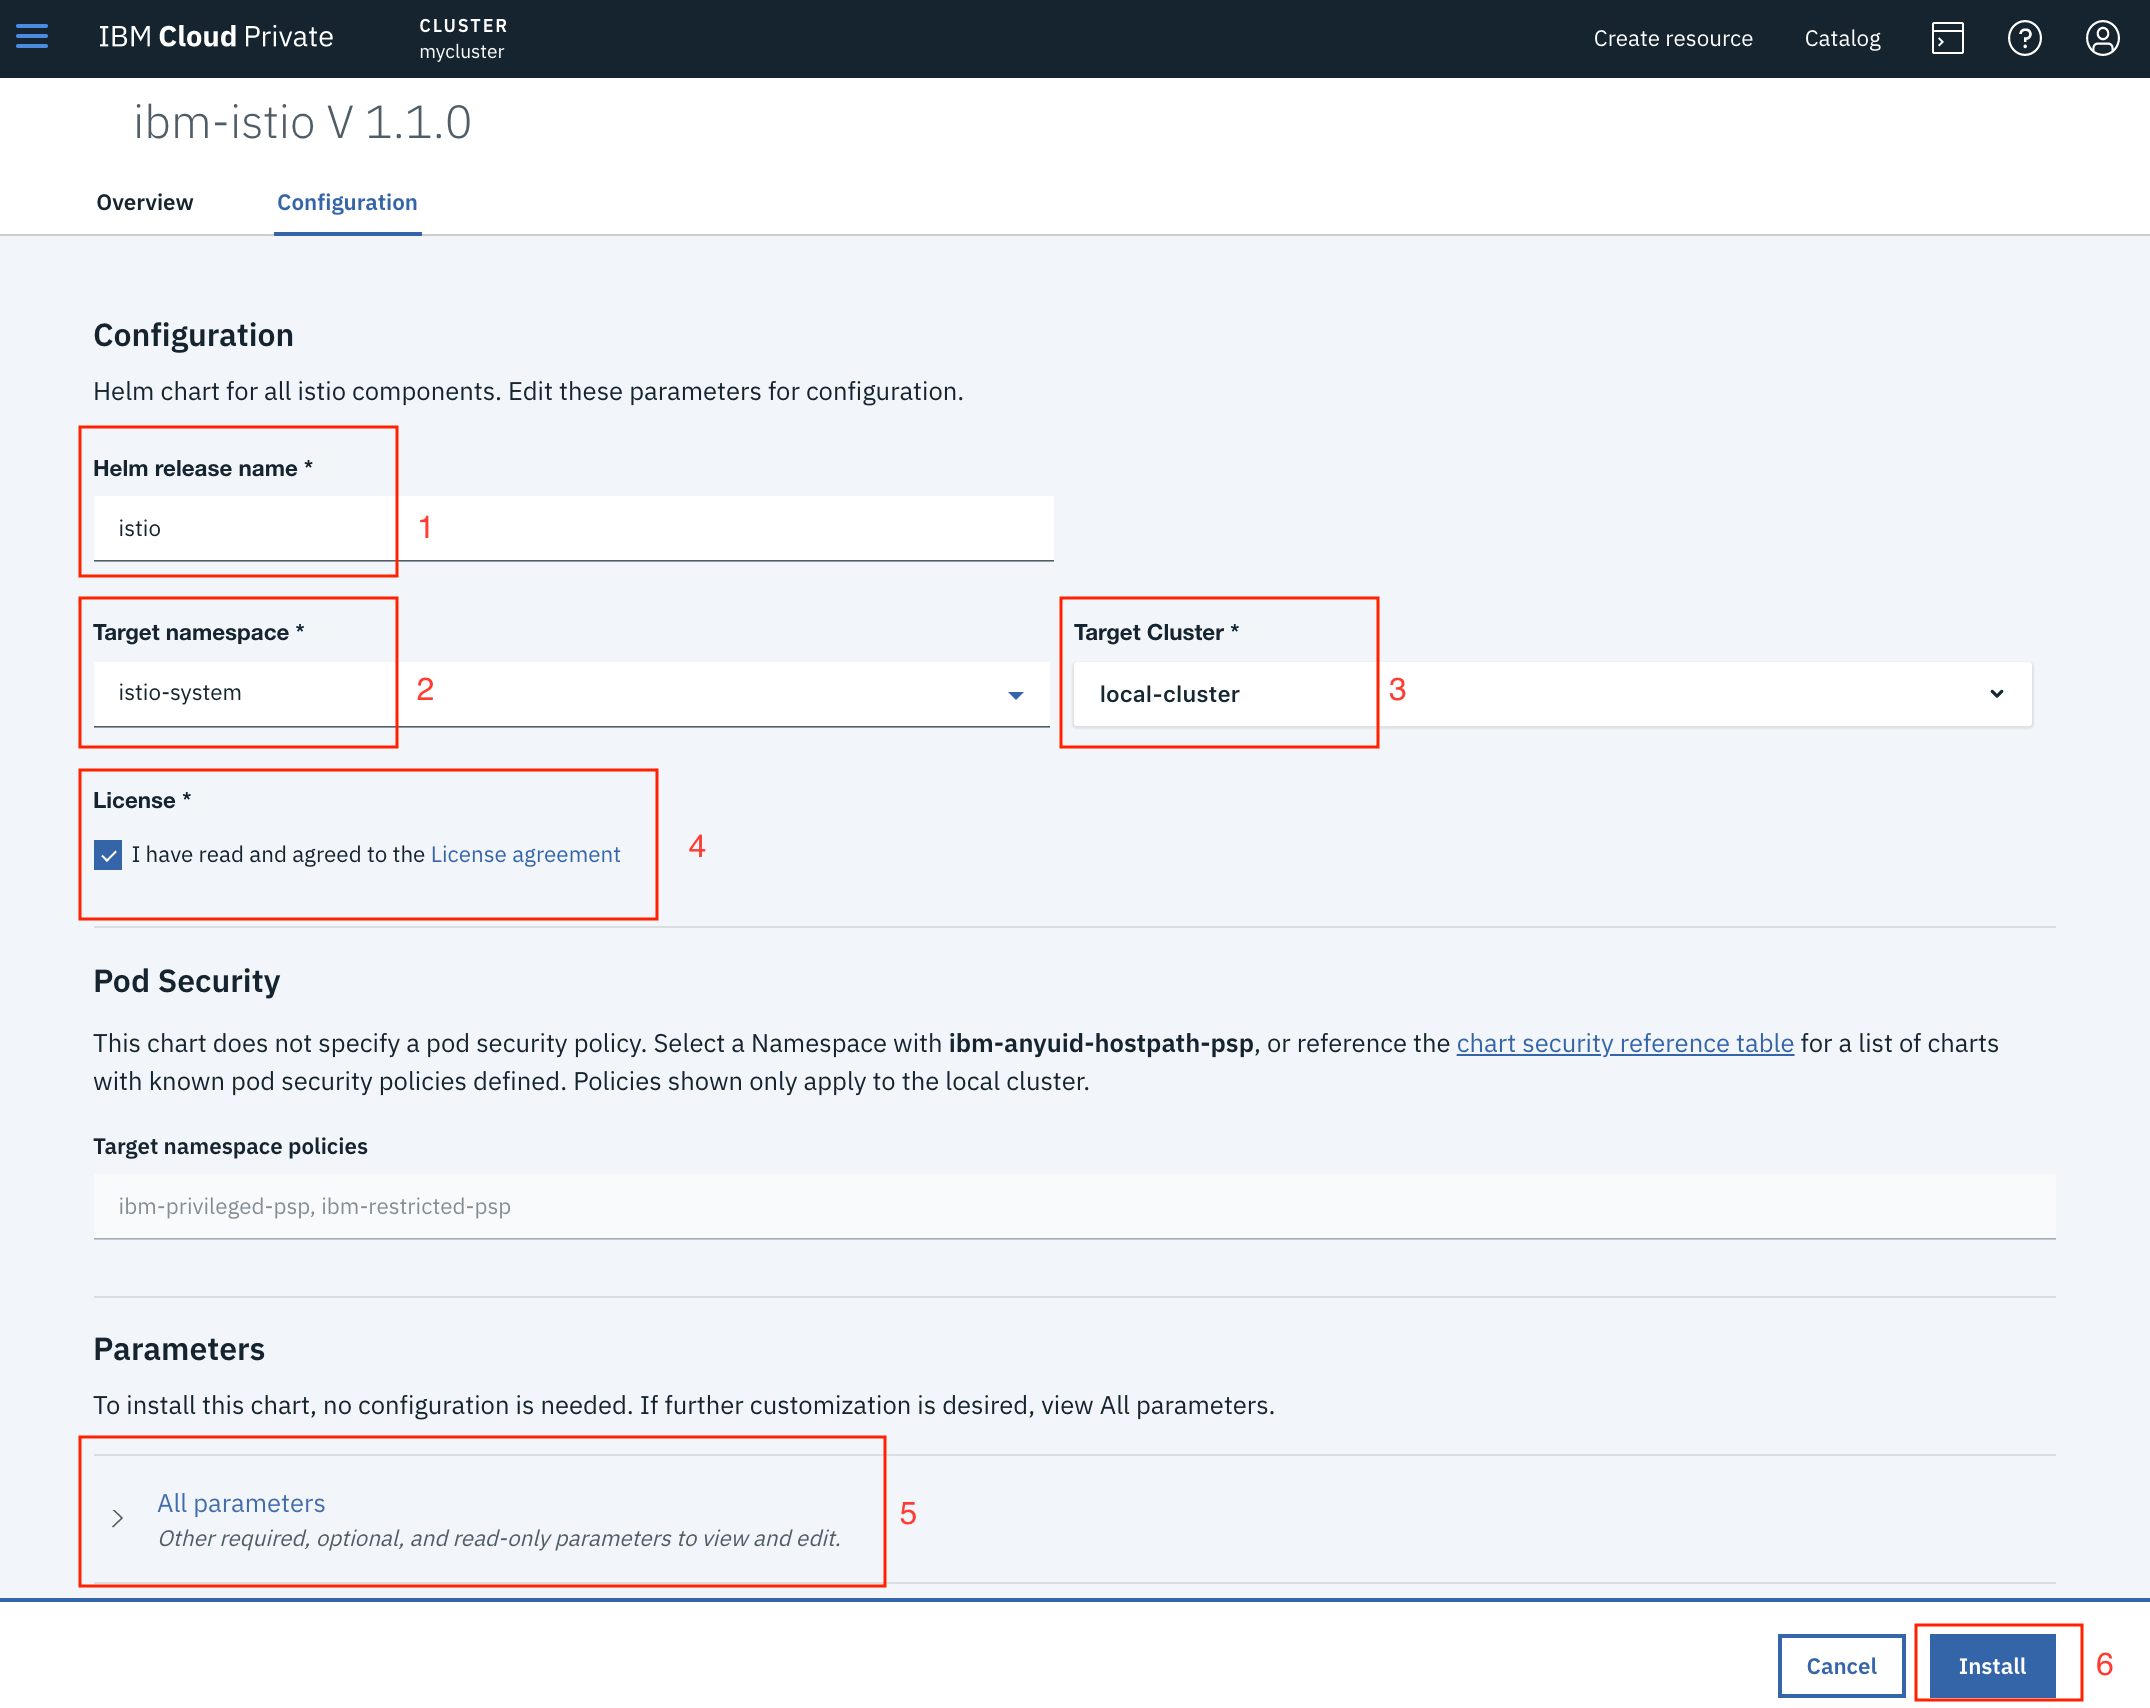
- 输入 Helm 部署实例的名称(例如:
istio-1.0.3),并选择istio-system作为目标 namespace。 - 同意许可条款。
- (可选的)点击
All parameters自定义安装参数。 - 点击
Install按钮。
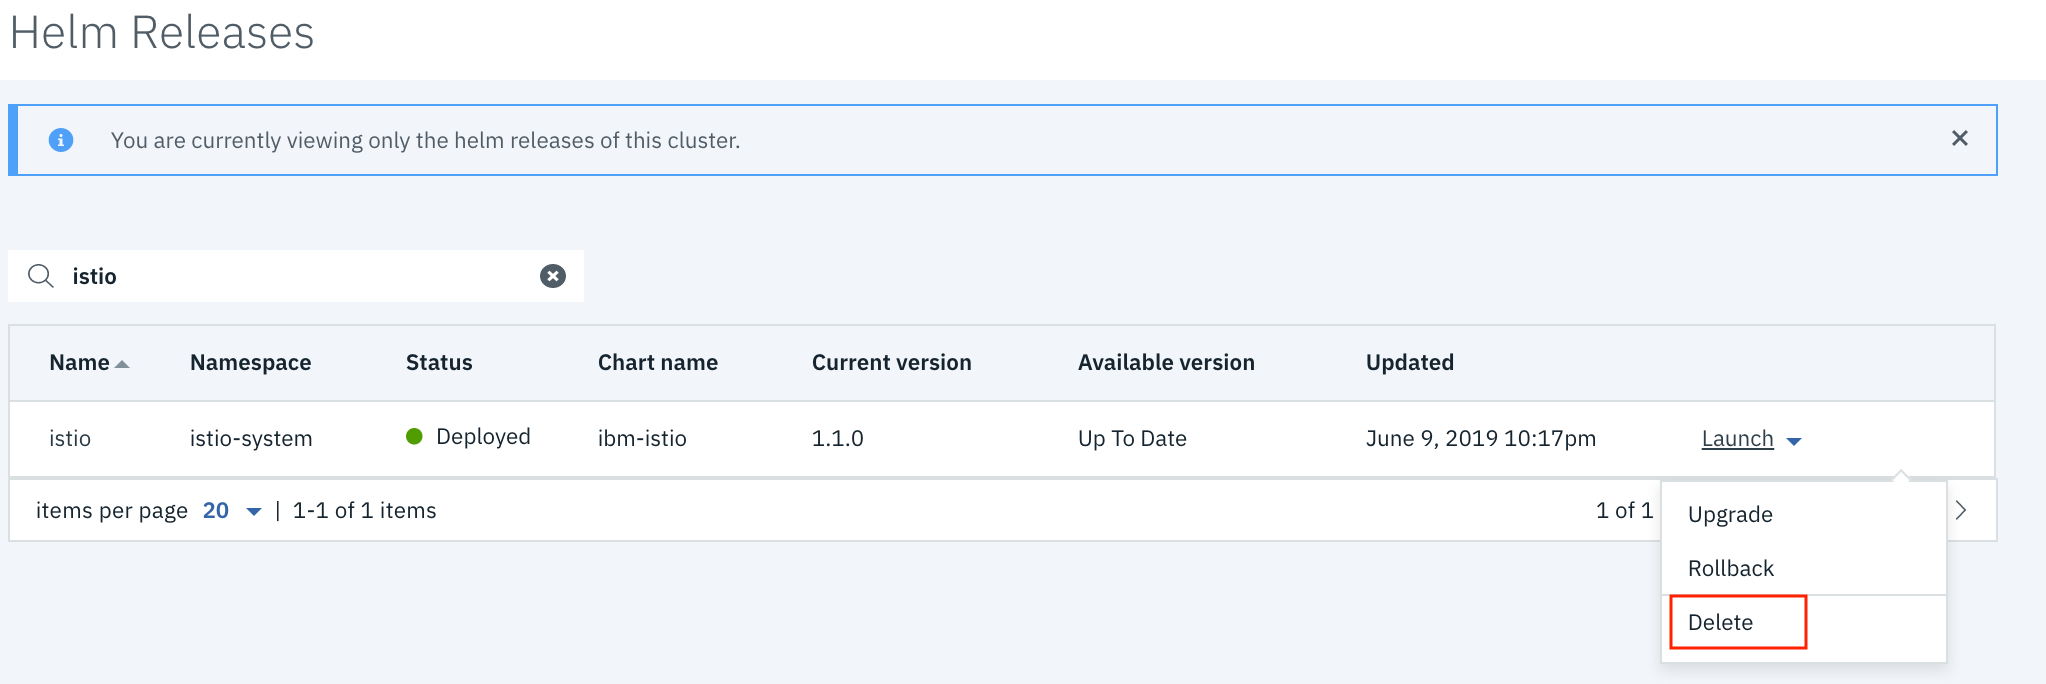
安装完成后,你可以在 Helm Releases 页通过搜索实例名找到它。
升级或回滚
- 登录到 IBM 私有云控制台。
- 点击导航栏左侧的菜单按钮。
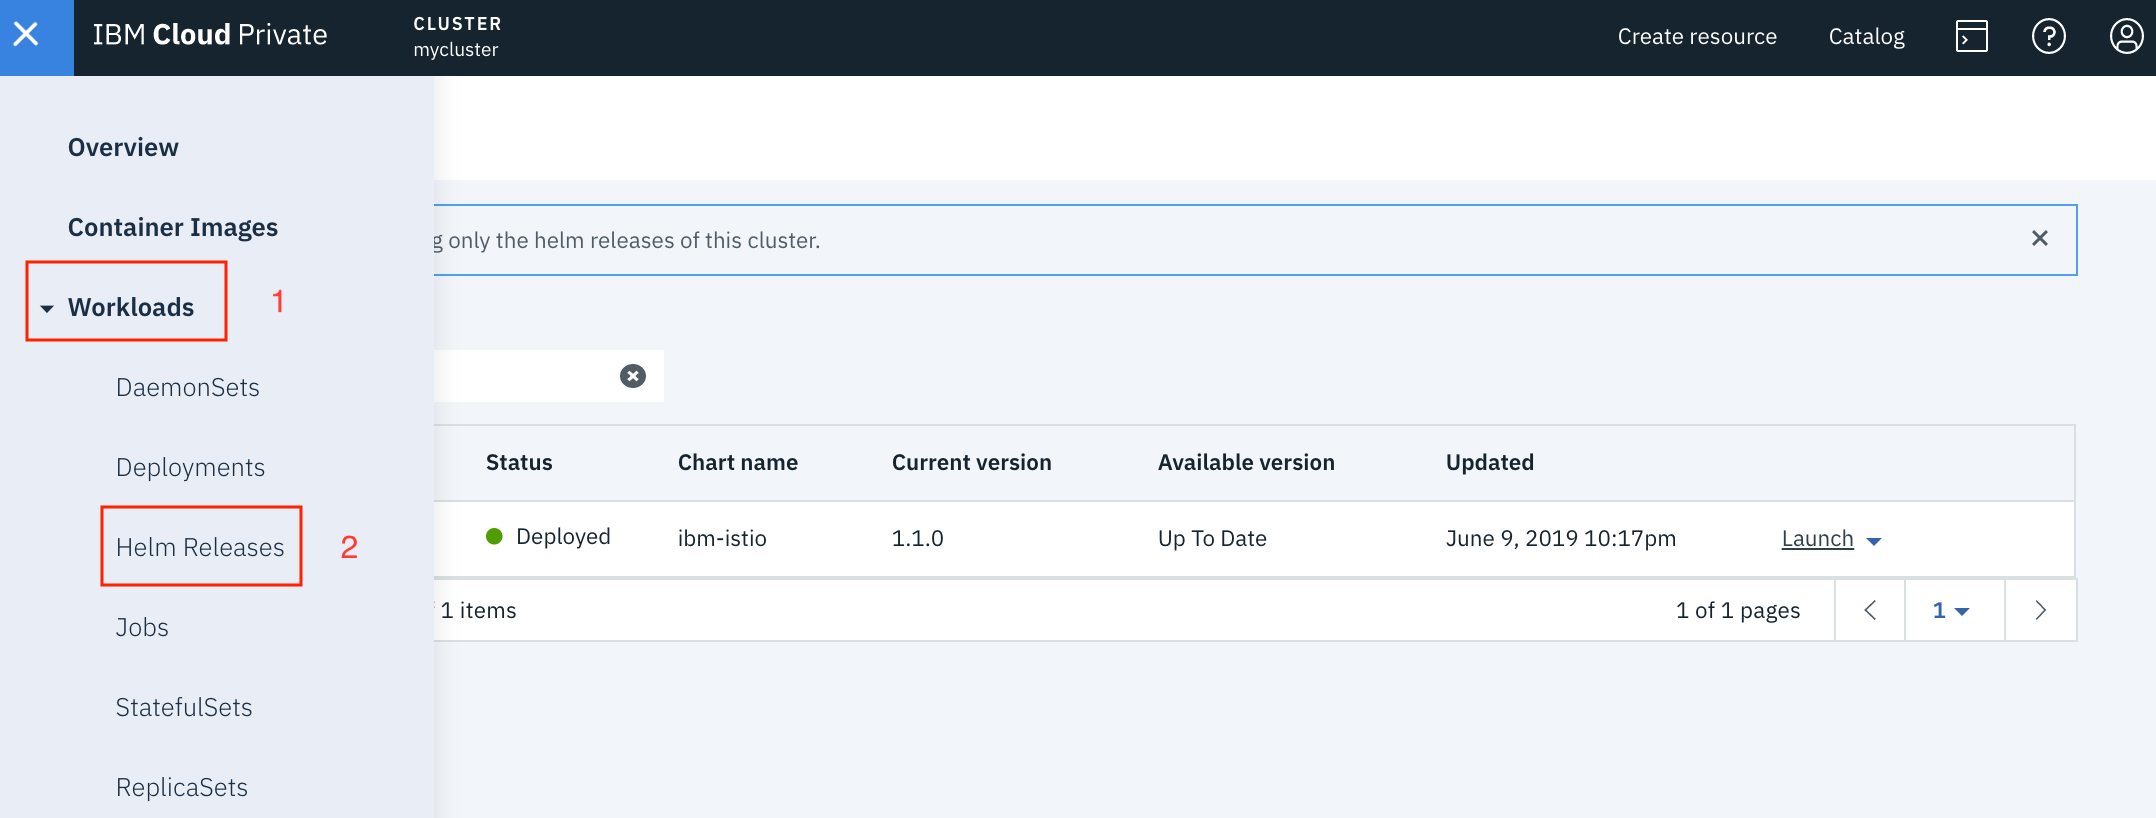
- 点击
Workloads并选中Helm Releases。 - 通过实例名找到已安装的 Istio。
- 点击
Action然后选择upgrade或rollback。
卸载
- 登录到 IBM 私有云控制台。
- 点击导航栏左侧的菜单按钮。
- 点击
Workloads并选中Helm Releases。 - 通过实例名找到已安装的 Istio。
- 点击
Action并选择delete。
