Install Istio using the IBM Cloud
Follow this guide to install and configure an Istio mesh in IBM Cloud.
You can use the managed Istio add-on for IBM Cloud Kubernetes Service in IBM Cloud Public, install Istio manually in IBM Cloud Public, or install Istio in IBM Cloud Private.
IBM Cloud Public
Managed Istio add-on
Istio on IBM Cloud Kubernetes Service provides a seamless installation of Istio, automatic updates and lifecycle management of Istio control plane components, and integration with platform logging and monitoring tools. With one click, you can get all Istio core components, additional tracing, monitoring, and visualization, and the Bookinfo sample app up and running. Istio on IBM Cloud Kubernetes Service is offered as a managed add-on, so IBM Cloud automatically keeps all your Istio components up to date.
To install the managed Istio add-on in IBM Cloud Public, you can use the UI or the CLI.
To use the UI:
In your cluster dashboard, click the name of a cluster.
Click the Add-ons tab.
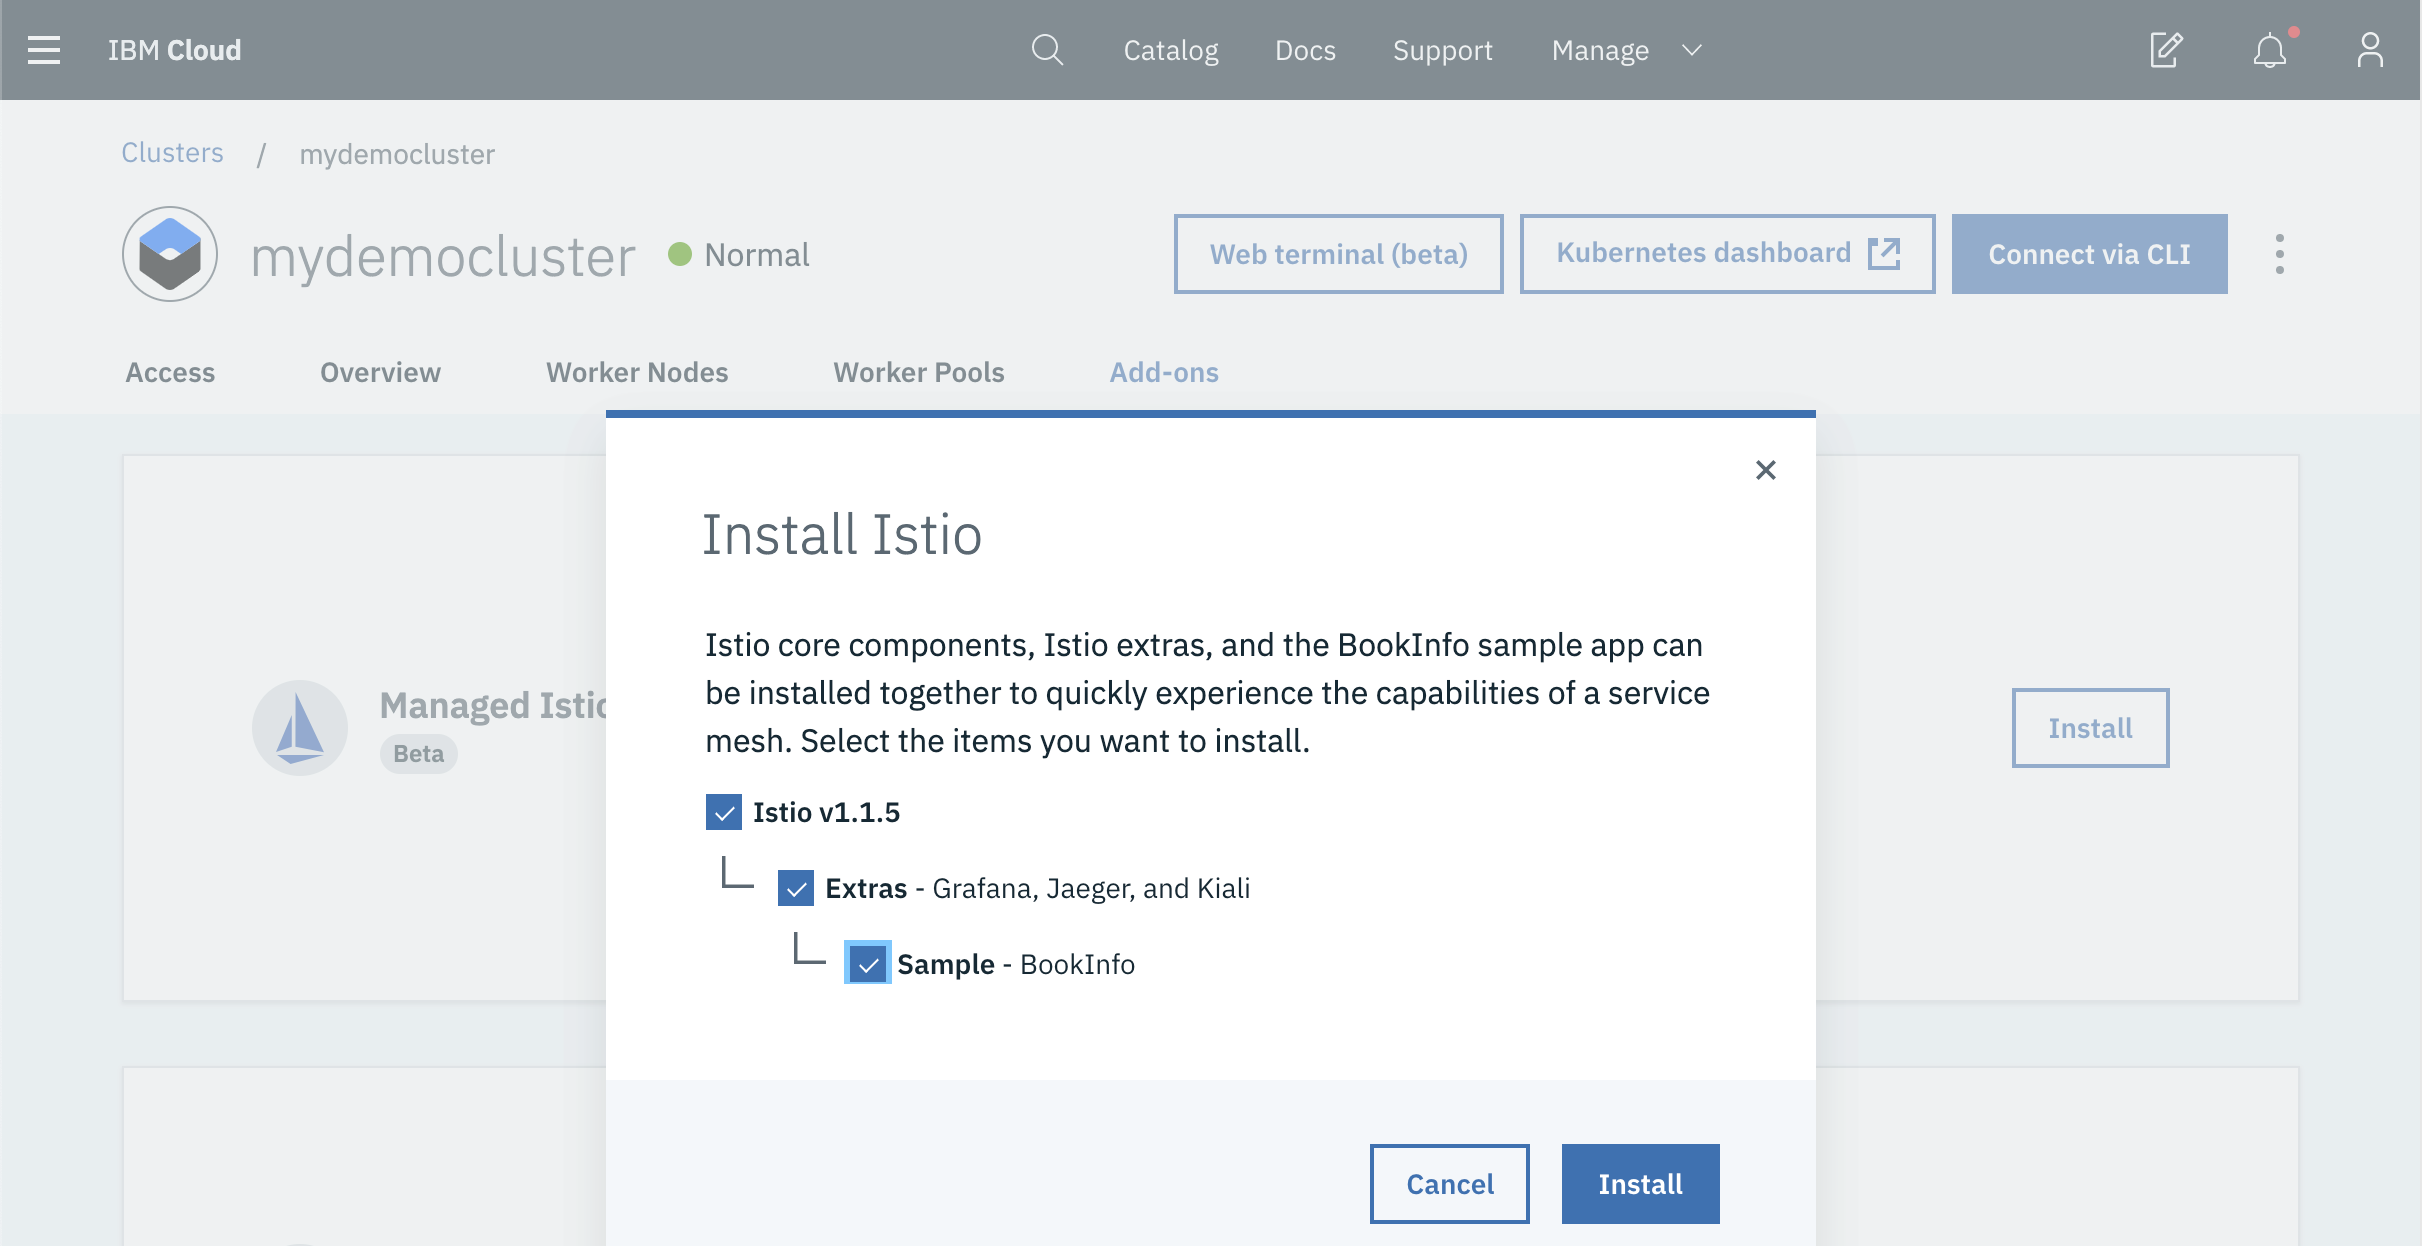
On the Istio card, click Install. The Istio check box is already selected. To also install the Istio extras and BookInfo sample app, select the Istio Extras and the Istio Sample check boxes.
Enable managed Istio add-ons in the IBM Cloud console Click Install. On the Istio card, verify that the add-ons you enabled are listed.
To use the CLI:
Install the
istio,istio-extras, andistio-sample-bookinfoadd-ons.$ ibmcloud ks cluster-addon-enable istio --cluster <cluster_name_or_ID>$ ibmcloud ks cluster-addon-enable istio-extras --cluster <cluster_name_or_ID>$ ibmcloud ks cluster-addon-enable istio-sample-bookinfo --cluster <cluster_name_or_ID>Verify that the Istio services are deployed and their corresponding pods have a
STATUSofRunning.$ kubectl get svc -n istio-system$ kubectl get pods -n istio-systemVerify that the BookInfo microservices are deployed and their corresponding pods have a
STATUSofRunning.$ kubectl get svc -n default$ kubectl get pods -n default
Manual Istio install
Follow these instructions to install and run the current release version of Istio in IBM Cloud Public using the IBM Cloud Kubernetes Service (IKS).
To upgrade Istio in an existing IKS cluster, follow the upgrade instructions instead.
IBM Cloud Private
Follow these instructions to install and run Istio in
IBM Cloud Private
using the Catalog module.
This guide installs the current release version of Istio.
Prerequisites - IBM Cloud Private
- You need to have an available IBM Cloud Private cluster. Otherwise, you can follow Installing IBM Cloud Private-CE to create an IBM Cloud Private cluster.
Deploy Istio via the Catalog module
- Log in to the IBM Cloud Private console.
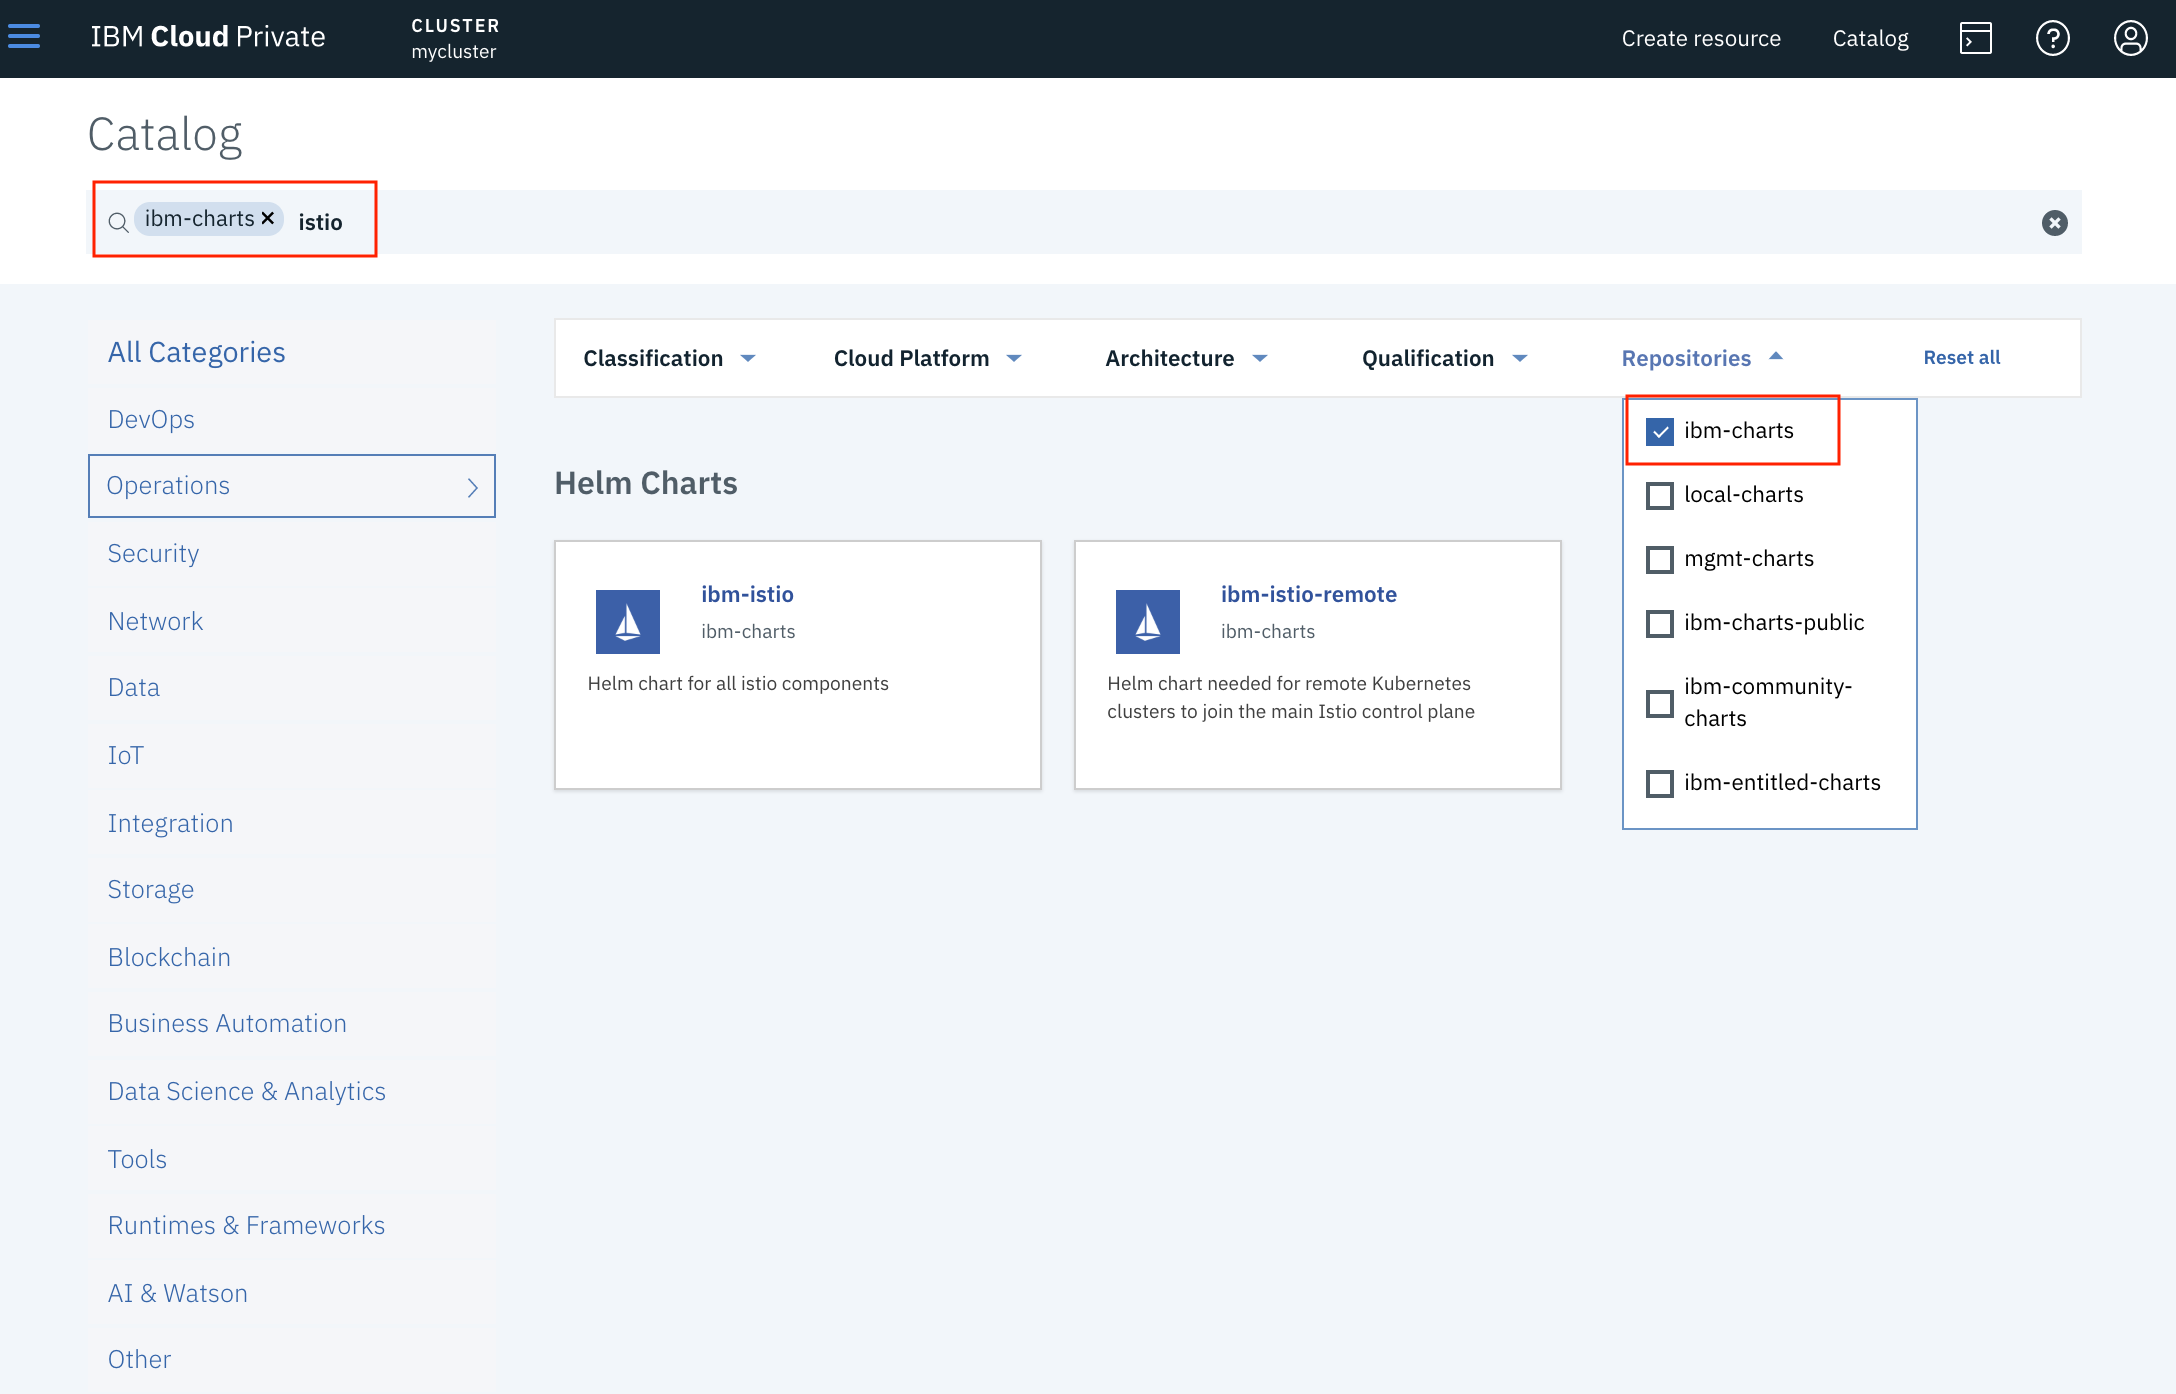
- Click
Catalogon the right side of the navigation bar. - Click
Repositoriesdrop-down on the right side of the search box. - Select the
ibm-chartscheck box. - Input
istioin the search box.
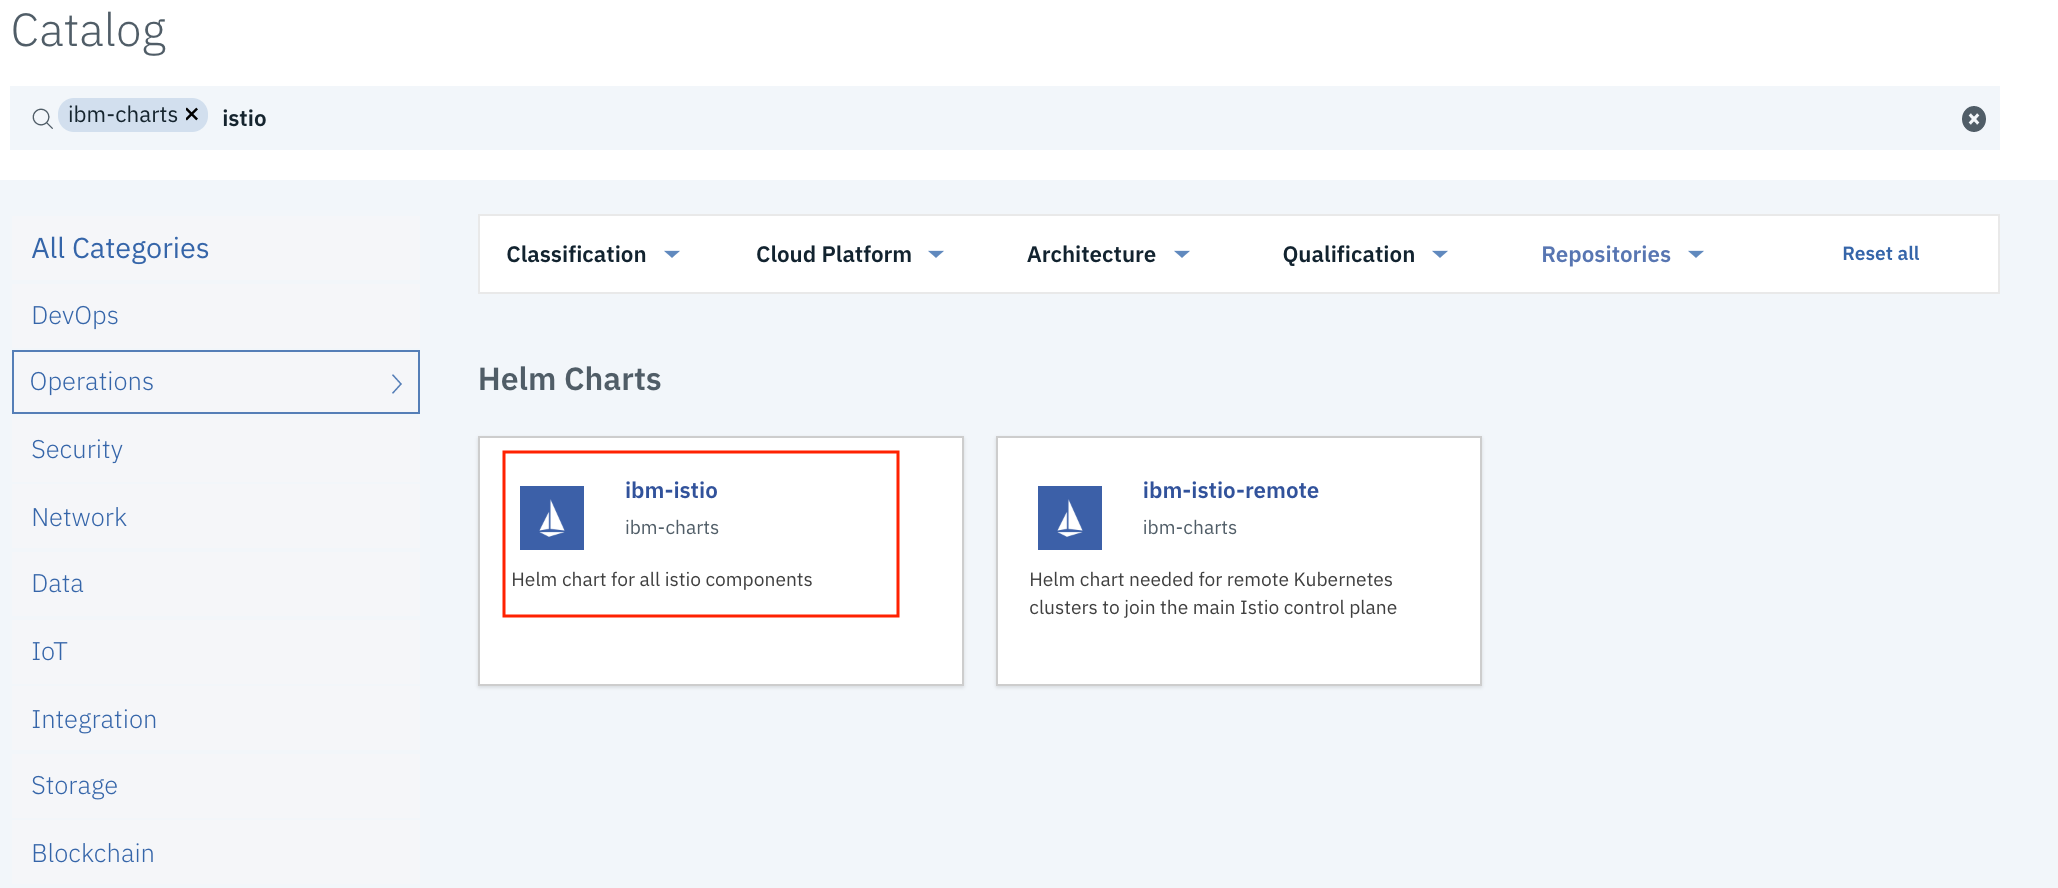
- Click
ibm-istioin the right panel.
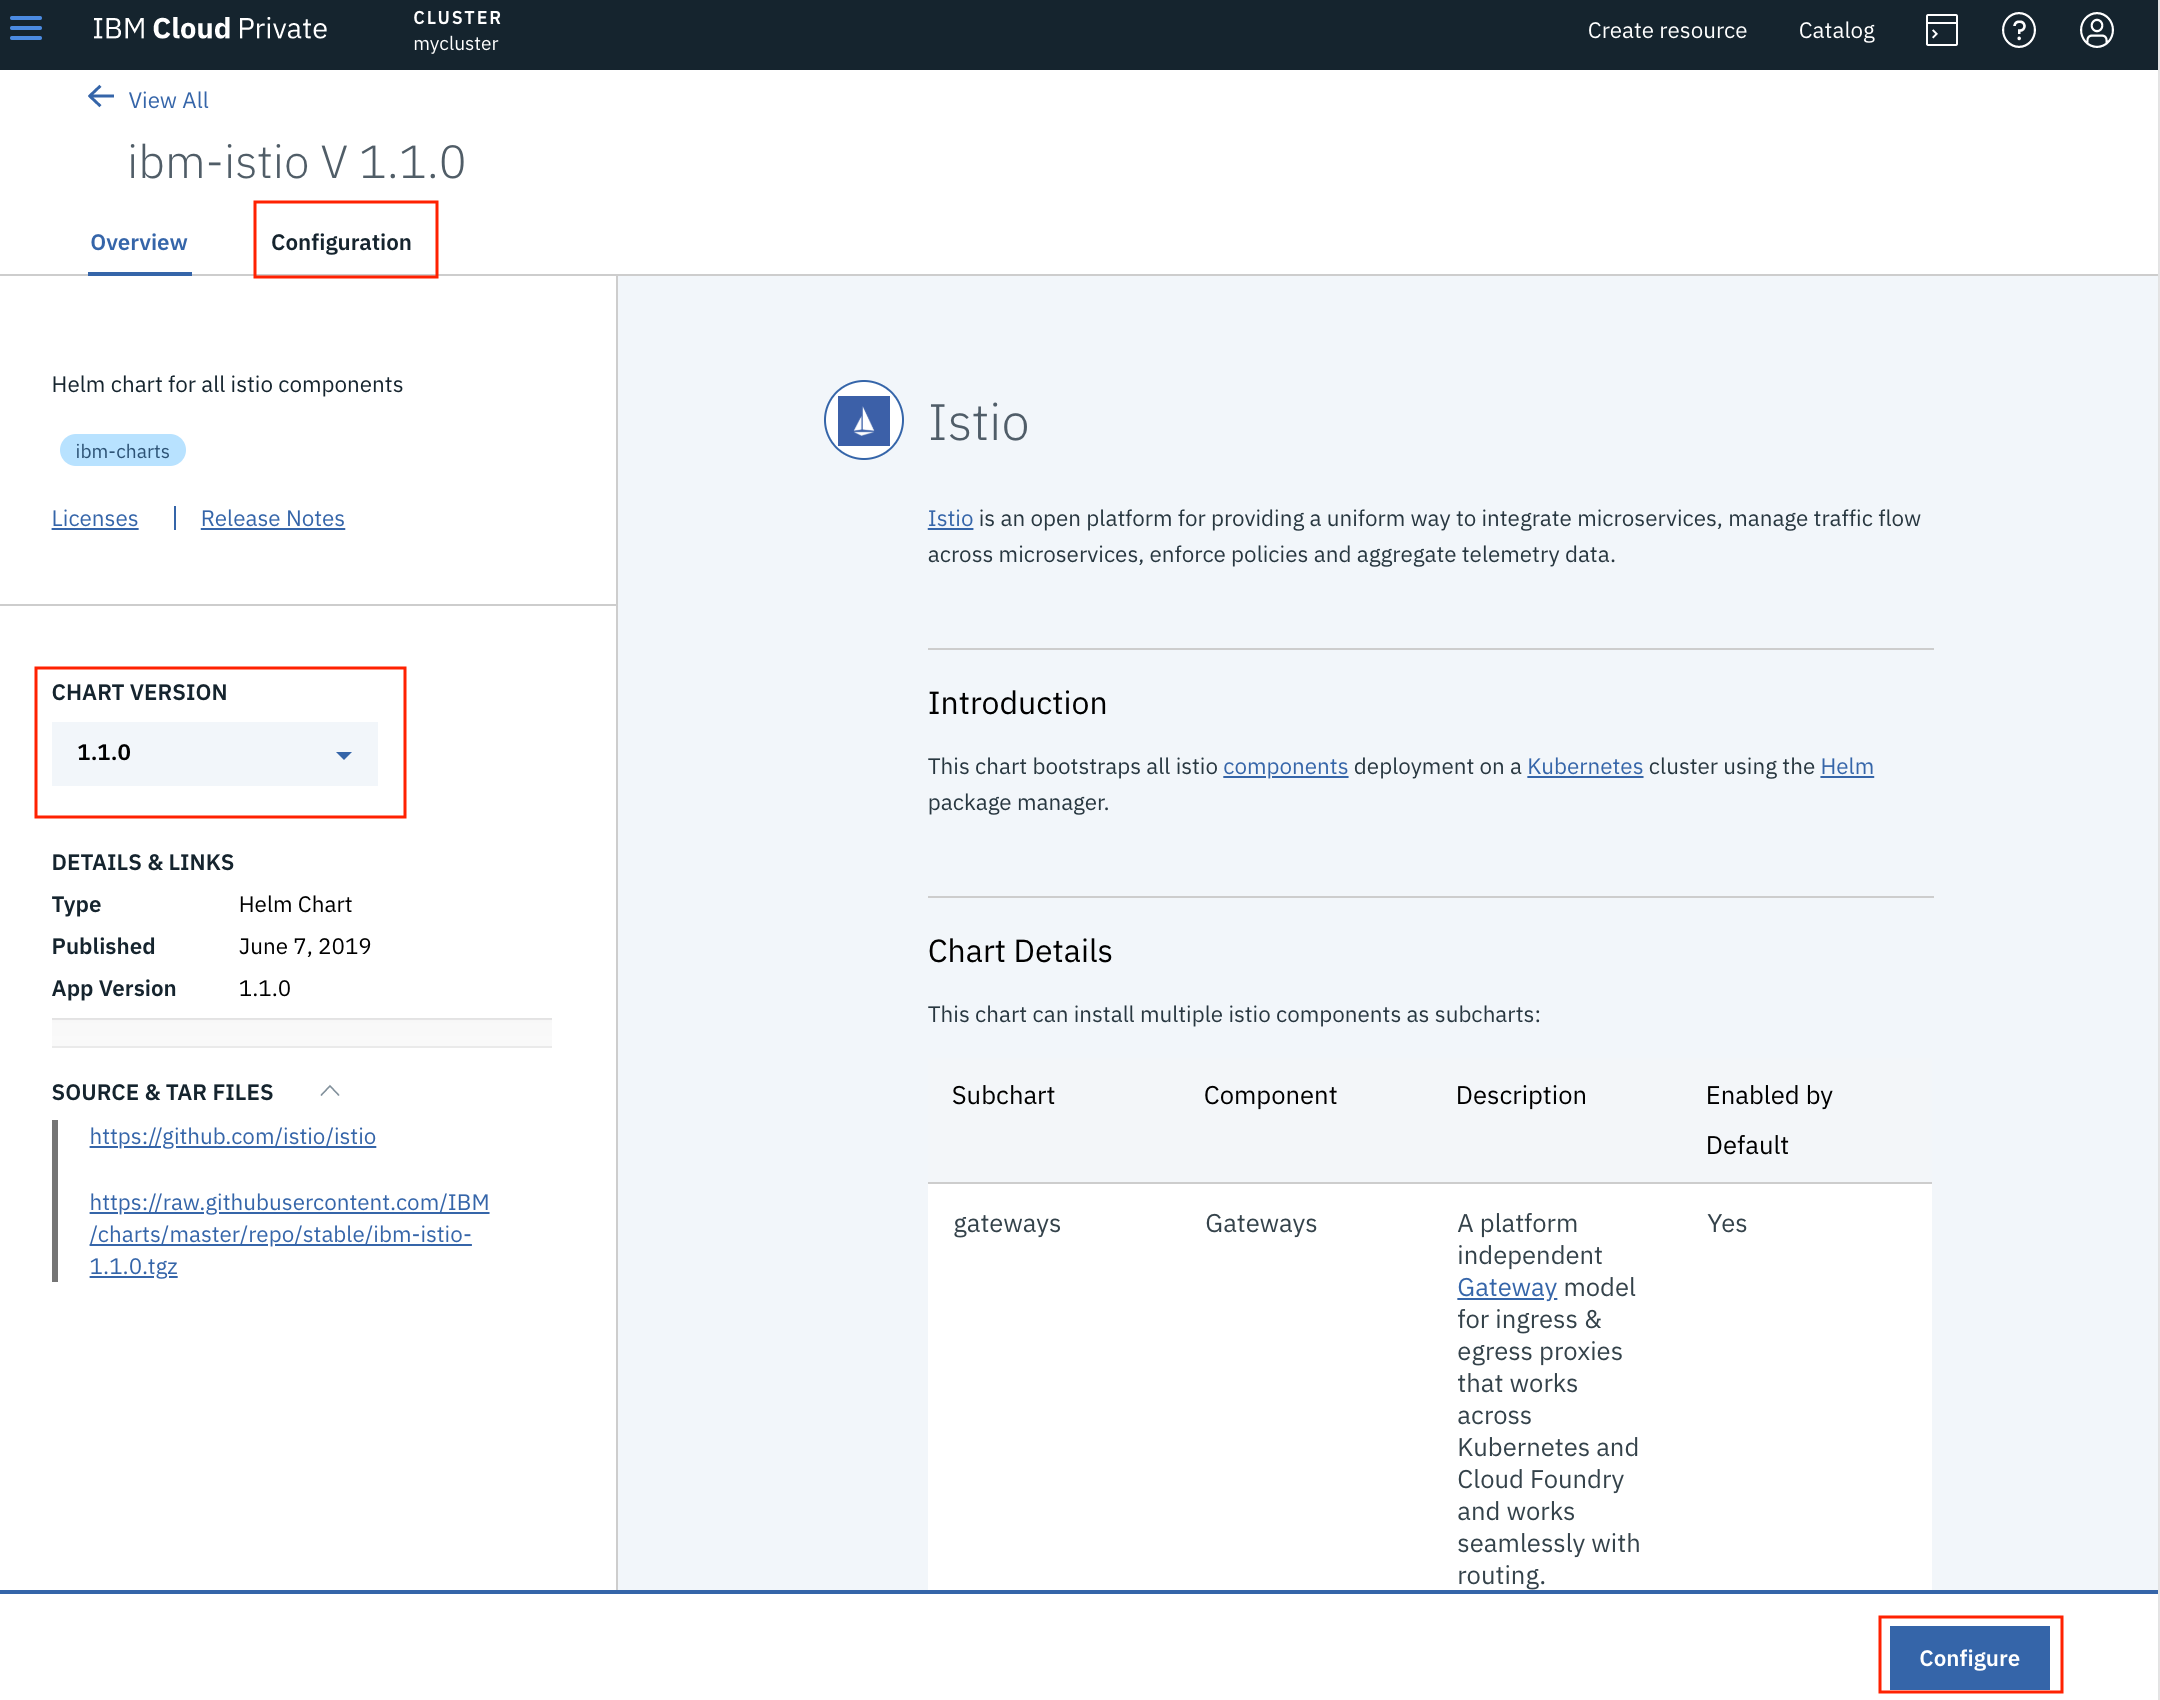
- (Optional) Change the Istio version using the
CHART VERSIONdrop-down. - Click the
Configurebutton at the bottom right corner.
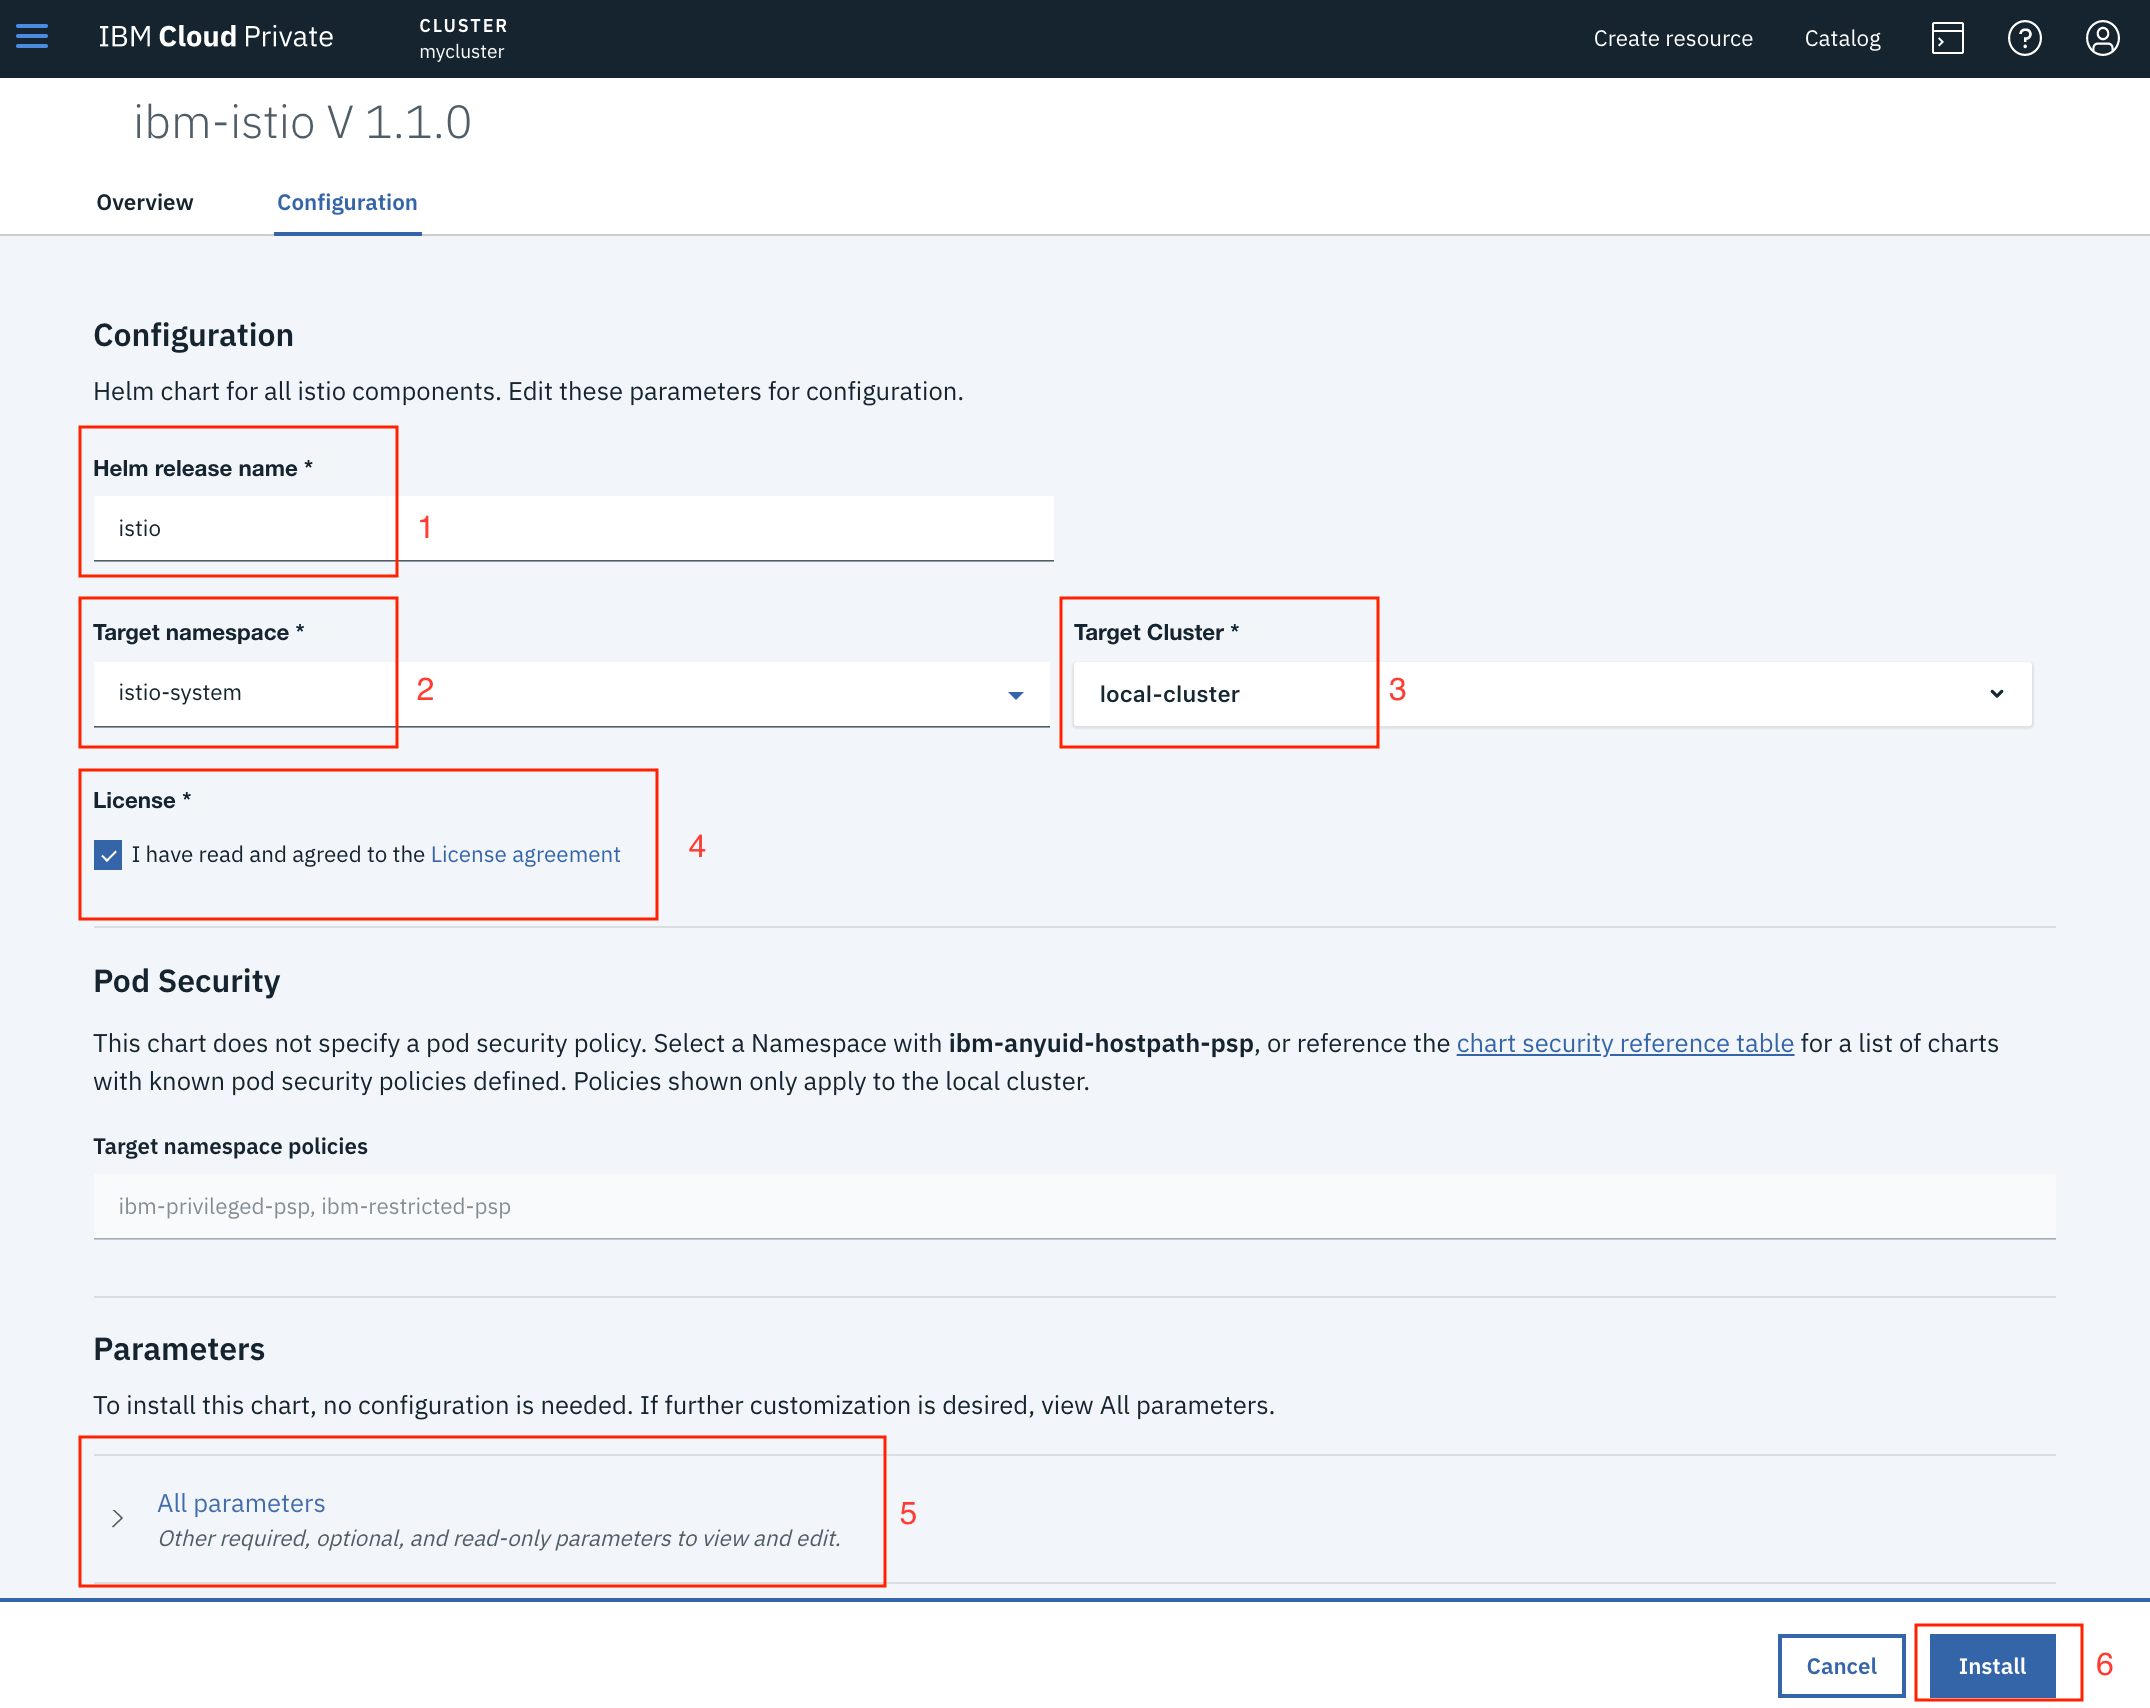
- Input the Helm release name (e.g.
istio). - Select
istio-systemas the target namespace. - Select
local-clusteras target cluster. - If you agree with the license terms, check the agree to license terms box.
- (Optional) Customize the installation parameters by clicking
All parameters. - Click the
Installbutton.
After Istio is installed, you can find it by searching for its release name on the Helm Releases page.
Upgrade or Rollback
- Log in to the IBM Cloud Private console.
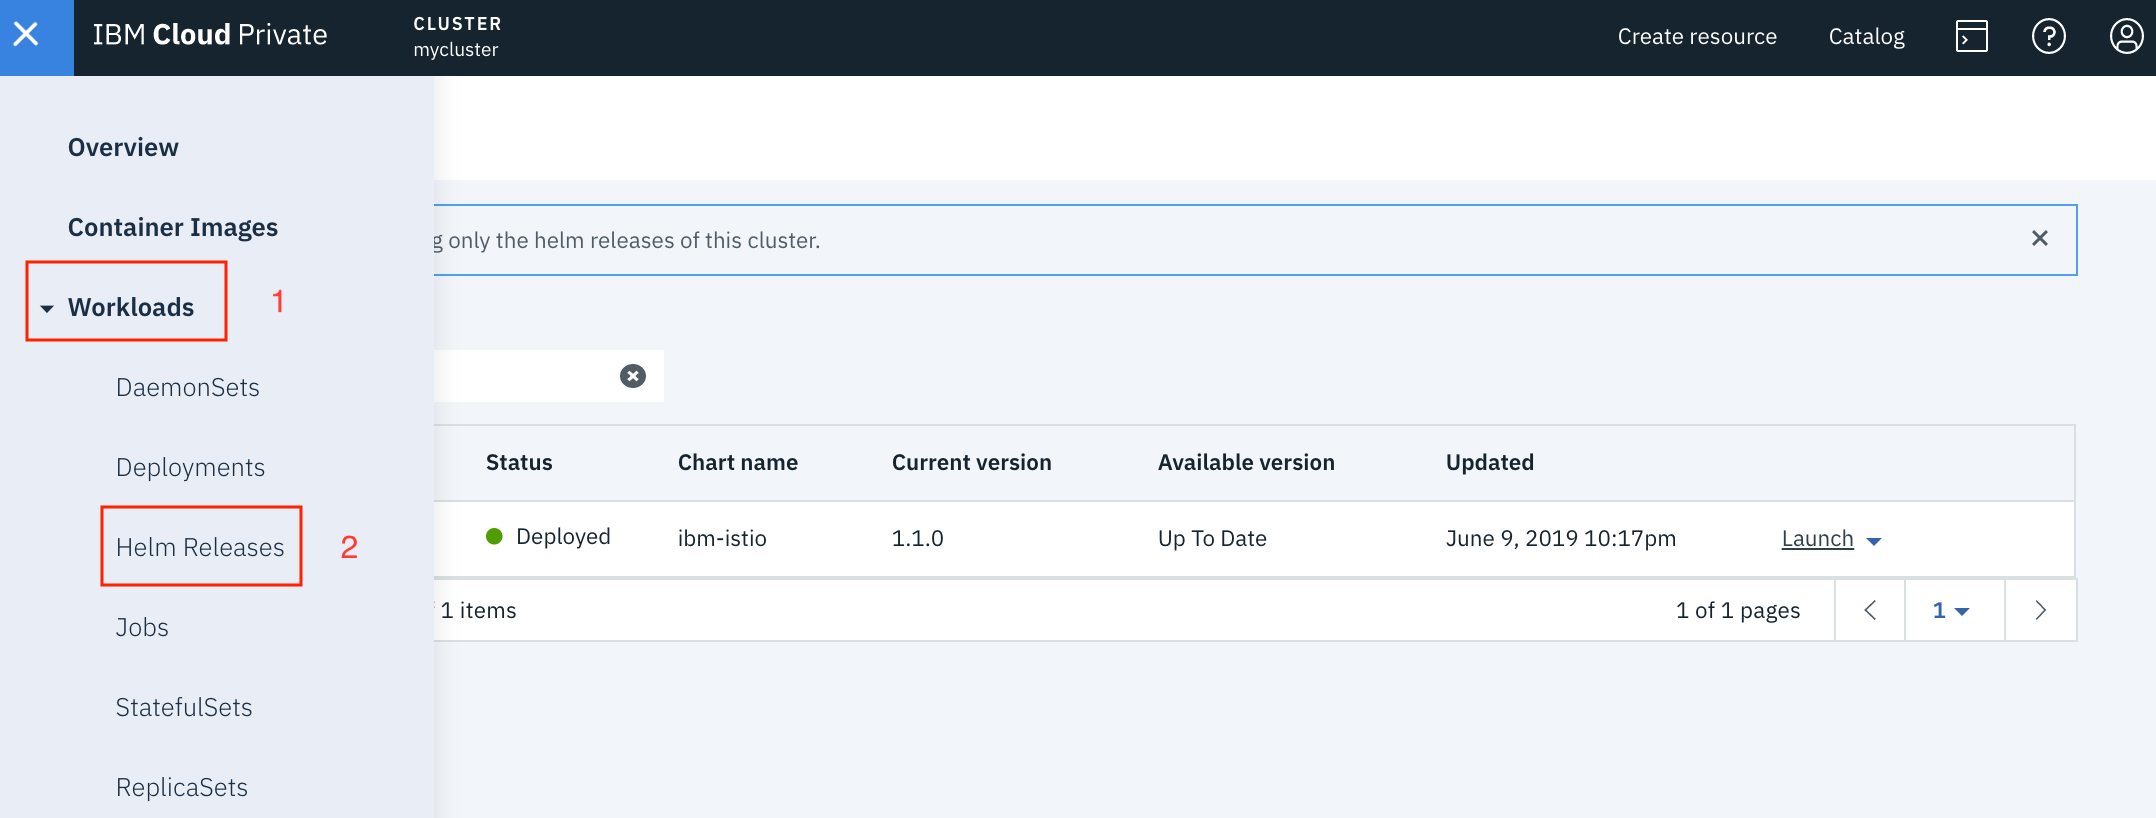
- Click the menu button on the left side of the navigation bar.
- Click
Workloadsand selectHelm Releases. - Find the installed Istio using its release name.
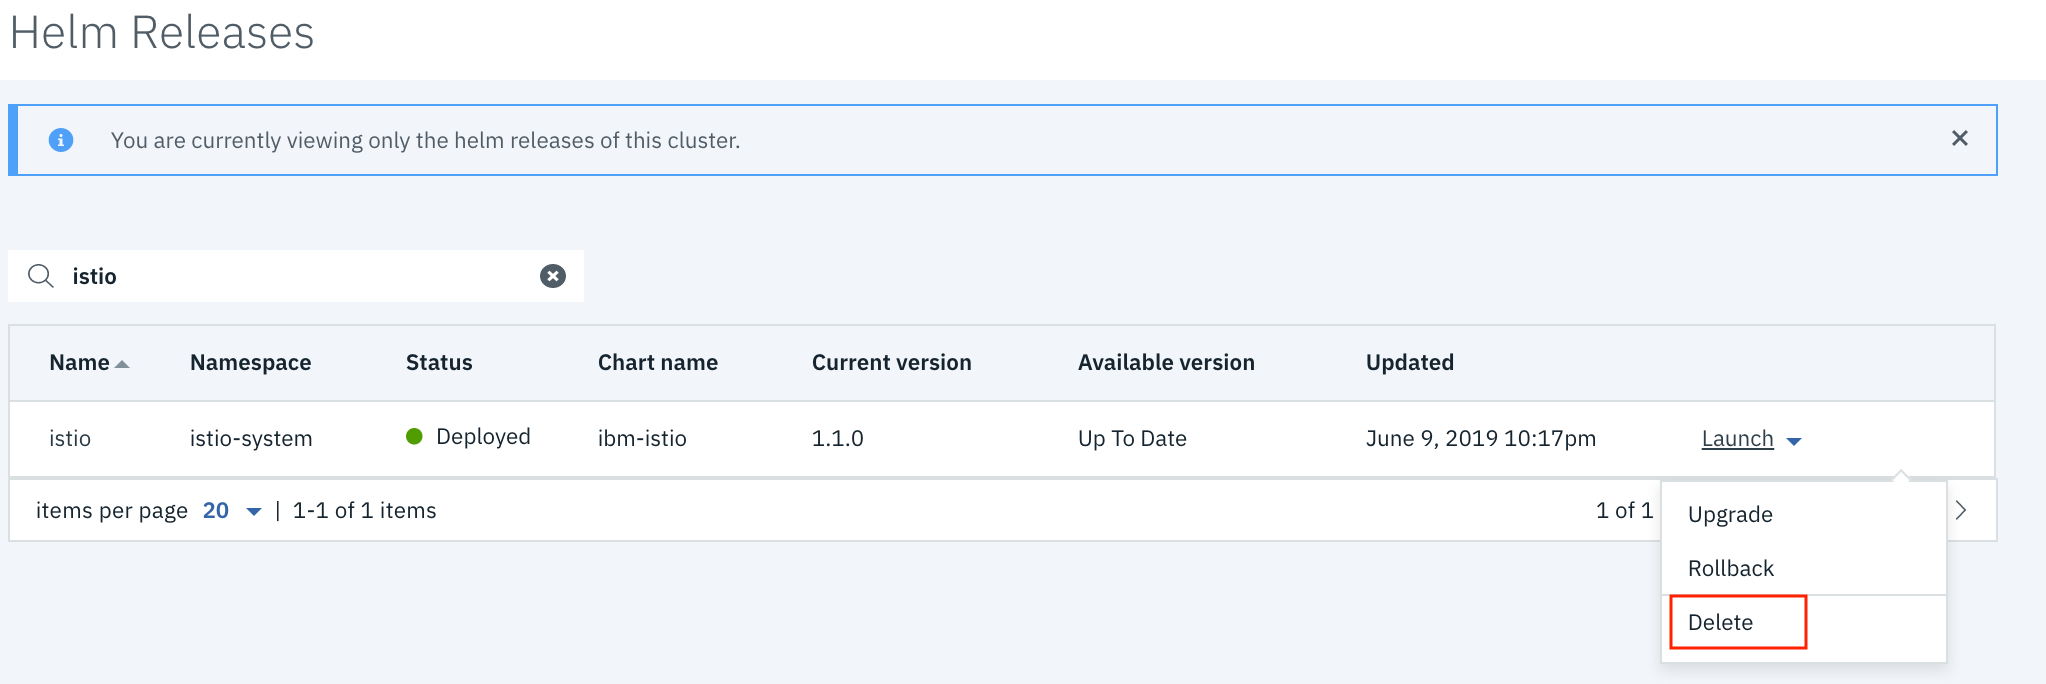
- Click
Actionand selectUpgradeorRollback.
Uninstalling
- Log in to the IBM Cloud Private console.
- Click the menu button on the left side of the navigation bar.
- Click
Workloadsand selectHelm Releases. - Find the installed Istio using its release name.
- Click
Actionand selectDelete.
