Install Istio on the Google Kubernetes Engine
Follow this guide to install and configure an Istio mesh Istio in the Google Kubernetes Engine (GKE).
Prerequisites
This sample requires a valid Google Cloud Platform project with billing enabled. If you are not an existing GCP user, you may be able to enroll for a $300 US Free Trial credit.
Ensure that the Google Kubernetes Engine API is enabled for your project (also found by navigating to “APIs & Services” -> “Dashboard” in the navigation bar). If you do not see “API enabled”, then you may enable the API by clicking the “Enable this API” button.
You must install and configure the
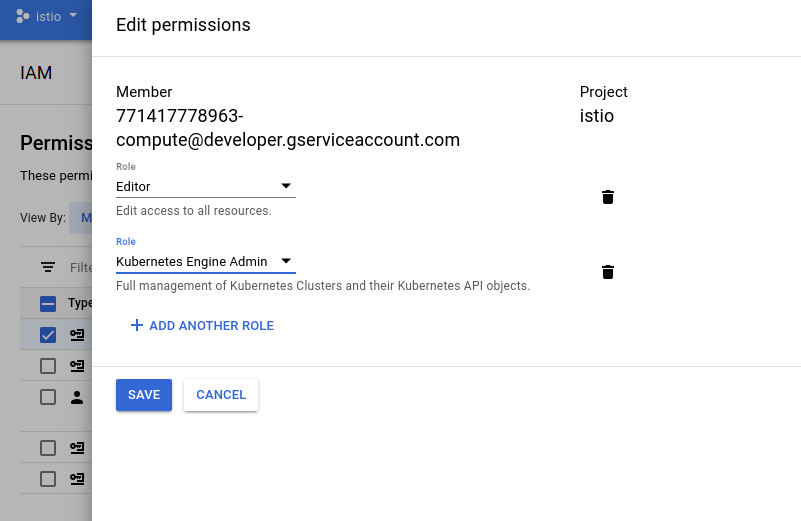
gcloudcommand line tool and include thekubectlcomponent (gcloud components install kubectl). If you don’t want to install thegcloudclient on your own machine, you can usegcloudvia Google Cloud Shell to perform the same tasks.You must set your default compute service account to include:
roles/container.admin(Kubernetes Engine Admin)Editor(on by default)
To set this up, navigate to the IAM section of the Cloud Console as shown below and find your default GCE/GKE service account in the following form: projectNumber-compute@developer.gserviceaccount.com: by default it should just have the Editor role. Then in the Roles drop-down list for that account, find the Kubernetes Engine group and select the role Kubernetes Engine Admin. The Roles listing for your account will change to Multiple.
Then add the Kubernetes Engine Admin role:
Setup using Istio on GKE
Refer to Installing Istio on GKE for instructions on creating a cluster with Istio installed.
You can now try out one of the Istio examples like Bookinfo.

