Enable Istio on all the microservices
Previously, you enabled Istio on a single microservice, productpage. You can
proceed to enable Istio on the microservices incrementally to get the Istio
functionality for more microservices. For the purpose of this tutorial, you will
enable Istio on all the remaining microservices in one step.
For the purpose of this tutorial, scale the deployments of the microservices down to 1:
$ kubectl scale deployments --all --replicas 1Redeploy the Bookinfo application, Istio-enabled. The service
productpagewill not be redeployed since it already has Istio injected, and its pods will not be changed. This time you will use only a single replica of a microservice.$ curl -s https://raw.githubusercontent.com/istio/istio/release-1.15/samples/bookinfo/platform/kube/bookinfo.yaml | istioctl kube-inject -f - | kubectl apply -l app!=reviews -f - $ curl -s https://raw.githubusercontent.com/istio/istio/release-1.15/samples/bookinfo/platform/kube/bookinfo.yaml | istioctl kube-inject -f - | kubectl apply -l app=reviews,version=v2 -f - service/details unchanged serviceaccount/bookinfo-details unchanged deployment.apps/details-v1 configured service/ratings unchanged serviceaccount/bookinfo-ratings unchanged deployment.apps/ratings-v1 configured serviceaccount/bookinfo-reviews unchanged service/productpage unchanged serviceaccount/bookinfo-productpage unchanged deployment.apps/productpage-v1 configured deployment.apps/reviews-v2 configuredAccess the application’s webpage several times. Note that Istio was added transparently, the original application did not change. It was added on the fly, without the need to undeploy and redeploy the whole application.
Check the application pods and verify that now each pod has two containers. One container is the microservice itself, the other is the sidecar proxy attached to it:
$ kubectl get pods
details-v1-58c68b9ff-kz9lf        2/2       Running   0          2m
productpage-v1-59b4f9f8d5-d4prx   2/2       Running   0          2m
ratings-v1-b7b7fbbc9-sggxf        2/2       Running   0          2m
reviews-v2-dfbcf859c-27dvk        2/2       Running   0          2m
sleep-88ddbcfdd-cc85s             1/1       Running   0          7h
Access the Istio dashboard using the custom URL you set in your
/etc/hostsfile previously:http://my-istio-dashboard.io/dashboard/db/istio-mesh-dashboardIn the top left drop-down menu, select Istio Mesh Dashboard. Note that now all the services from your namespace appear in the list of services.
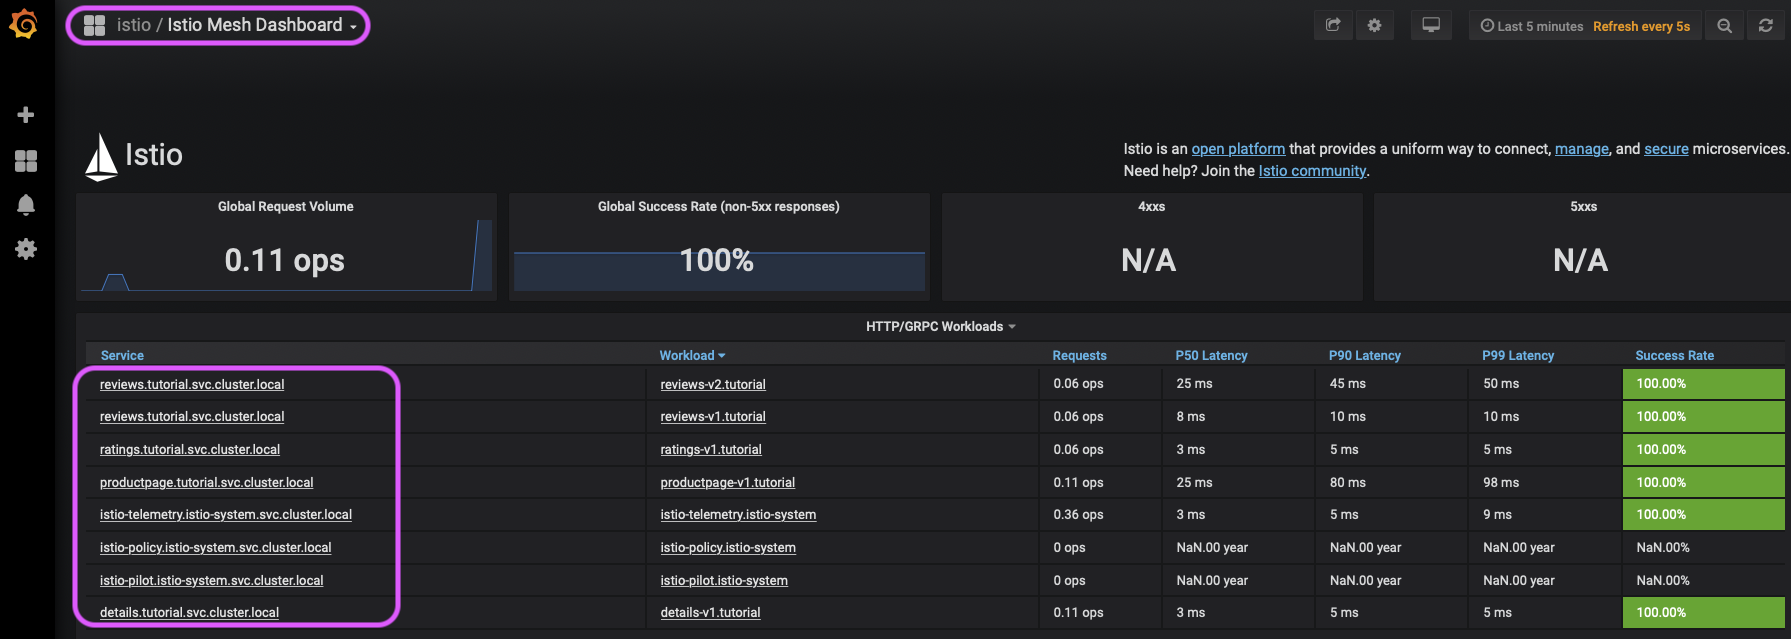
Istio Mesh Dashboard Check some other microservice in Istio Service Dashboard, e.g.
ratings: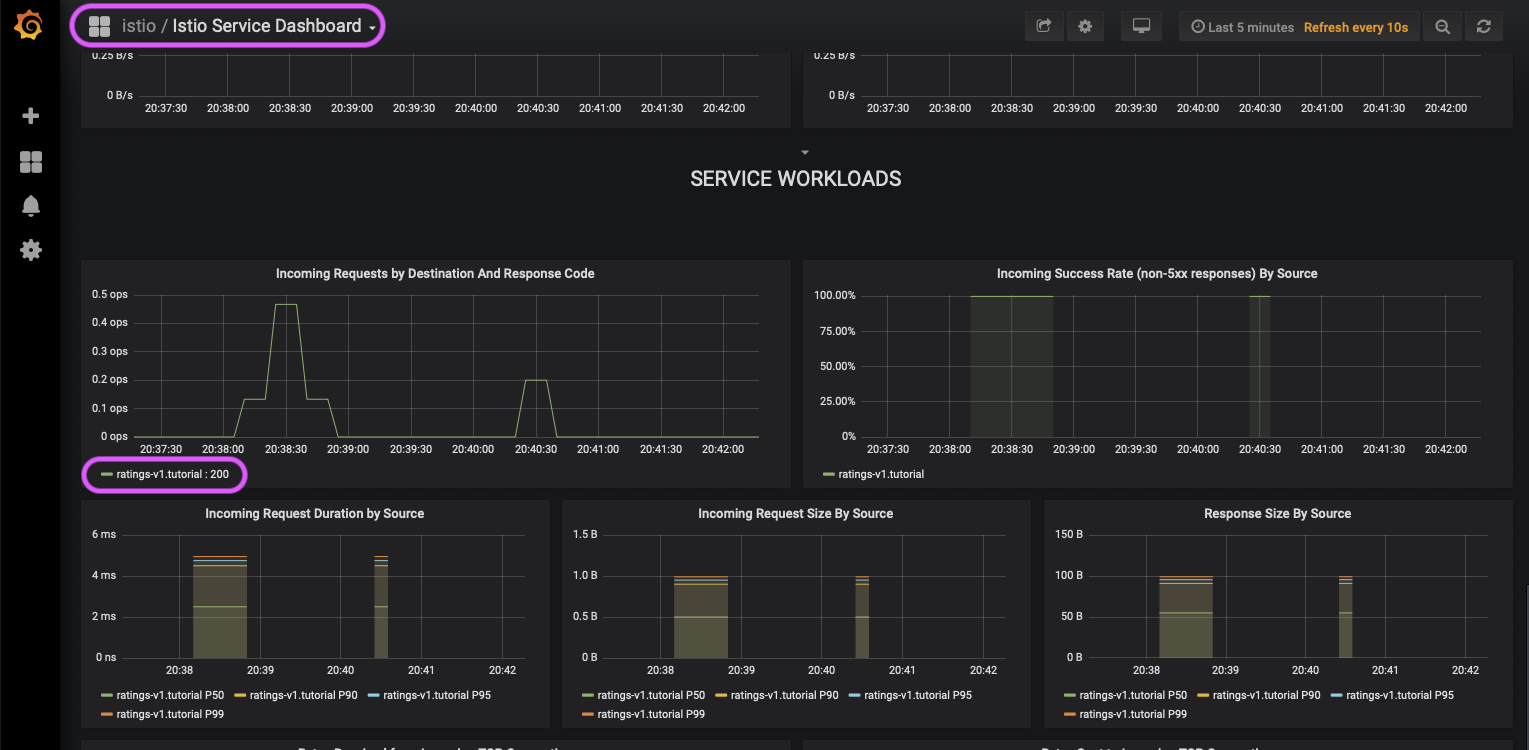
Istio Service Dashboard Visualize your application’s topology by using the Kiali console, which is not a part of Istio, but is installed as part of the
democonfiguration. Access the dashboard using the custom URL you set in your/etc/hostsfile previously:http://my-kiali.io/kiali/consoleIf you installed Kiali as part of the getting started instructions, your Kiali console user name is
adminand the password isadmin.Click on the Graph tab and select your namespace in the Namespace drop-down menu in the top level corner. In the Display drop-down menu mark the Traffic Animation check box to see some cool traffic animation.
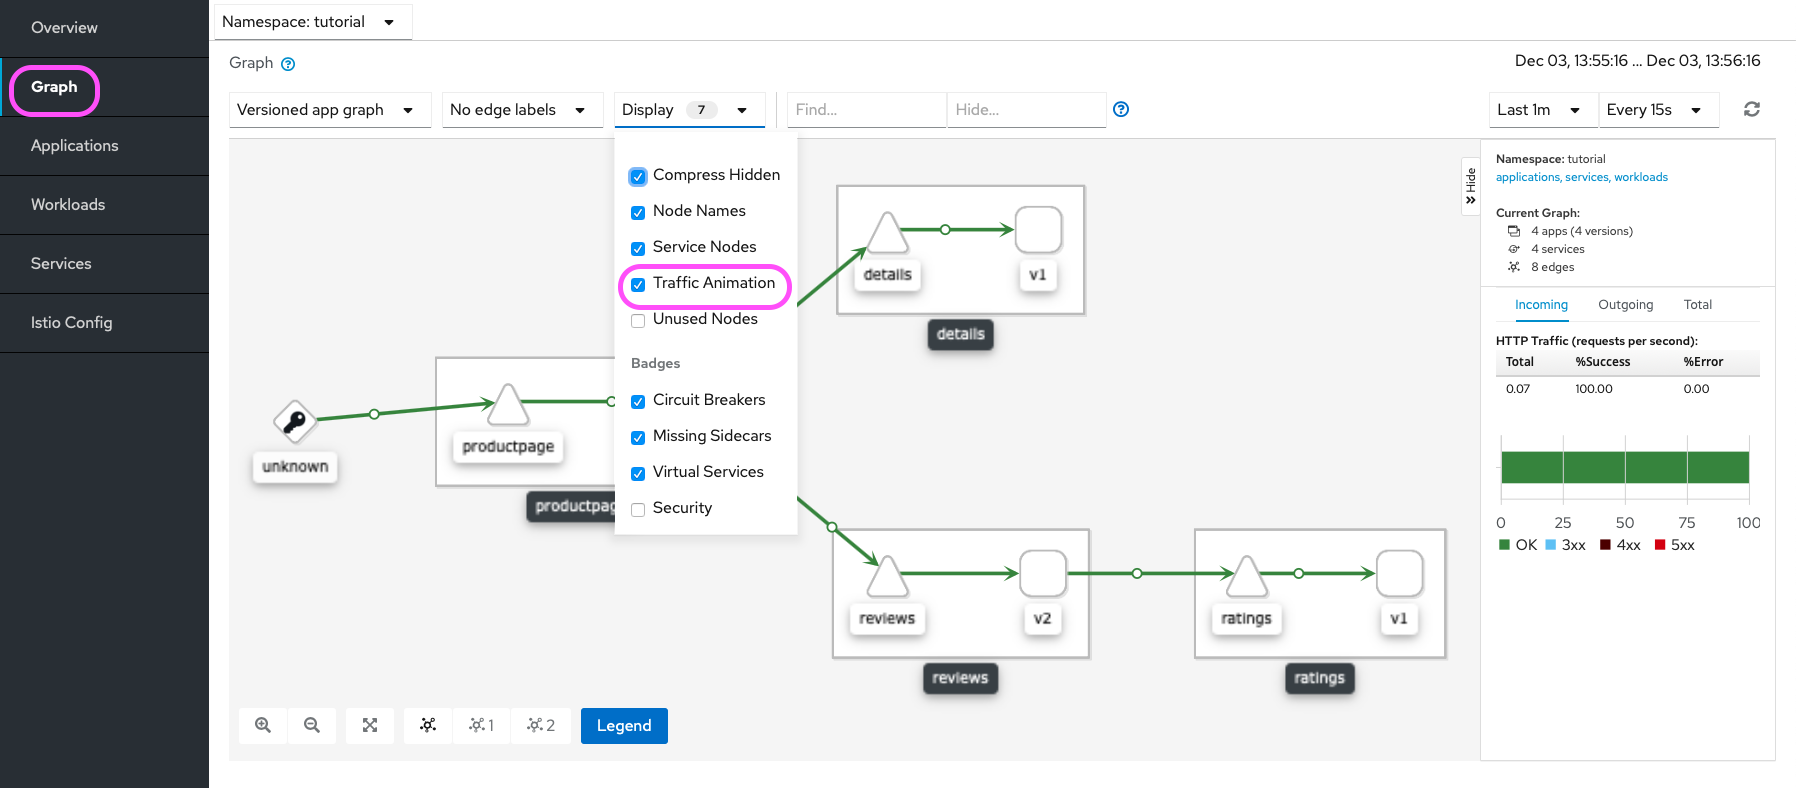
Kiali Graph Tab, display drop-down menu Try different options in the Edge Labels drop-down menu. Hover with the mouse over the nodes and edges of the graph. Notice the traffic metrics on the right.

Kiali Graph Tab, edge labels drop-down menu 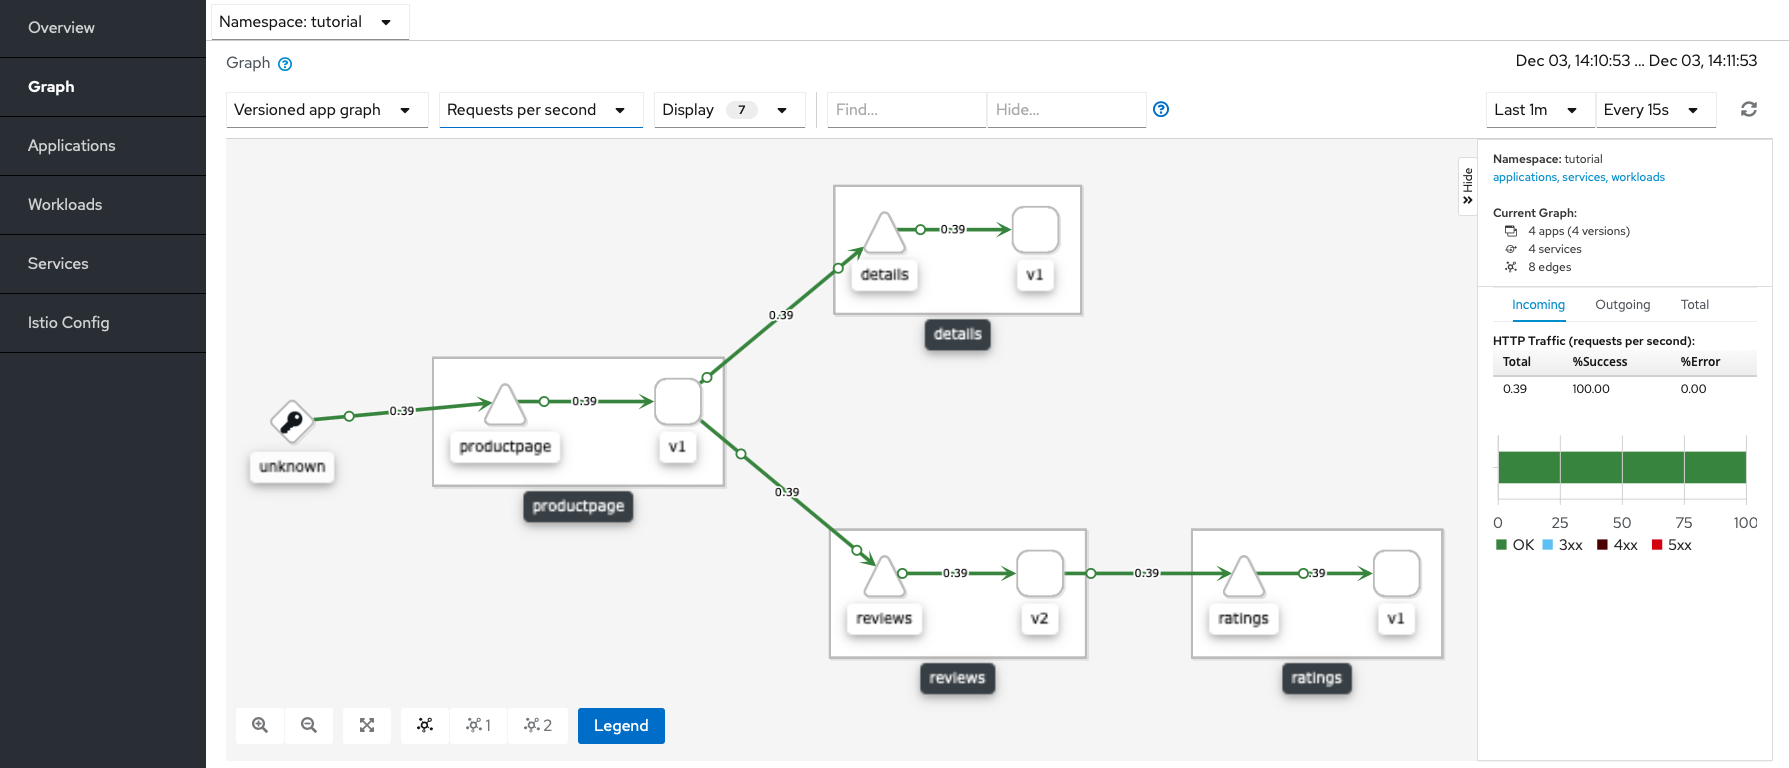
Kiali Graph Tab
You are ready to configure the Istio Ingress Gateway.