Quick Start with IBM Cloud
Follow these instructions to install and run Istio in IBM Cloud. You can install Istio in IBM Cloud Public or IBM Cloud Private.
IBM Cloud Public
Follow these instructions to install and run Istio in IBM Cloud Public by using Helm and the IBM Cloud Kubernetes Service.
This guide installs the current release version of Istio.
Prerequisites - IBM Cloud Public
- Install the IBM Cloud CLI, the IBM Cloud Kubernetes Service plug-in, and the Kubernetes CLI. Istio requires the Kubernetes version 1.9 or later. Make sure to install the
kubectlCLI version that matches the Kubernetes version of your cluster. - Make sure you have a cluster of Kubernetes version of 1.9 or later. If you do not have a cluster available, create a version 1.9 or later cluster.
- Target the CLI to your cluster by running
ibmcloud ks cluster-config <cluster_name_or_ID>and copying and pasting the command in the output.
Initialize Helm and Tiller
Install the Helm CLI.
Create a service account for Tiller in the
kube-systemnamespace and a Kubernetes RBAC cluster role binding for thetiller-deploypod:apiVersion: v1 kind: ServiceAccount metadata: name: tiller namespace: kube-system --- apiVersion: rbac.authorization.k8s.io/v1 kind: ClusterRoleBinding metadata: name: tiller roleRef: apiGroup: rbac.authorization.k8s.io kind: ClusterRole name: cluster-admin subjects: - kind: ServiceAccount name: tiller namespace: kube-systemCreate the service account and cluster role binding:
$ kubectl create -f rbac-config.yamlInitialize Helm and install Tiller:
$ helm init --service-account tillerAdd the IBM Cloud Helm repository to your Helm instance:
$ helm repo add ibm-charts https://registry.bluemix.net/helm/ibm-charts
Deploy the Istio Helm chart
If using a Helm version prior to 2.10.0, install Istio’s Custom Resource Definitions via
kubectl apply, and wait a few seconds for the CRDs to be committed in the kube-apiserver:$ kubectl apply -f https://raw.githubusercontent.com/IBM/charts/master/stable/ibm-istio/templates/crds.yamlInstall the Helm chart to your cluster:
$ helm install ibm-charts/ibm-istio --name=istio --namespace istio-systemEnsure the pods for the 9 Istio services and the pod for Prometheus are all fully deployed:
$ kubectl get pods -n istio-system
NAME                                       READY     STATUS      RESTARTS   AGE
istio-citadel-748d656b-pj9bw               1/1       Running     0          2m
istio-egressgateway-6c65d7c98d-l54kg       1/1       Running     0          2m
istio-galley-65cfbc6fd7-bpnqx              1/1       Running     0          2m
istio-ingressgateway-f8dd85989-6w6nj       1/1       Running     0          2m
istio-pilot-5fd885964b-l4df6               2/2       Running     0          2m
istio-policy-56f4f4cbbd-2z2bk              2/2       Running     0          2m
istio-sidecar-injector-646655c8cd-rwvsx    1/1       Running     0          2m
istio-statsd-prom-bridge-7fdbbf769-8k42l   1/1       Running     0          2m
istio-telemetry-8687d9d745-mwjbf           2/2       Running     0          2m
prometheus-55c7c698d6-f4drj                1/1       Running     0          2m
Upgrade
To upgrade your Istio Helm chart to the latest version:
$ helm upgrade -f config.yaml istio ibm/ibm-istio
Uninstall
Uninstall the Istio Helm deployment:
$ helm del istio --purgeIf your Helm version is less than 2.9.0, then you need to manually cleanup extra job resource before redeploy new version of Istio chart:
$ kubectl -n istio-system delete job --allIf desired, delete the Istio custom resource definitions:
$ kubectl delete -f https://raw.githubusercontent.com/IBM/charts/master/stable/ibm-istio/templates/crds.yaml
IBM Cloud Private
Follow these instructions to install and run Istio in
IBM Cloud Private
using the Catalog module.
This guide installs the current release version of Istio.
Prerequisites - IBM Cloud Private
- You need to have an available IBM Cloud Private cluster. Otherwise, you can follow Installing IBM Cloud Private-CE to create an IBM Cloud Private cluster.
Deploy Istio via the Catalog module
- Log in to the IBM Cloud Private console.
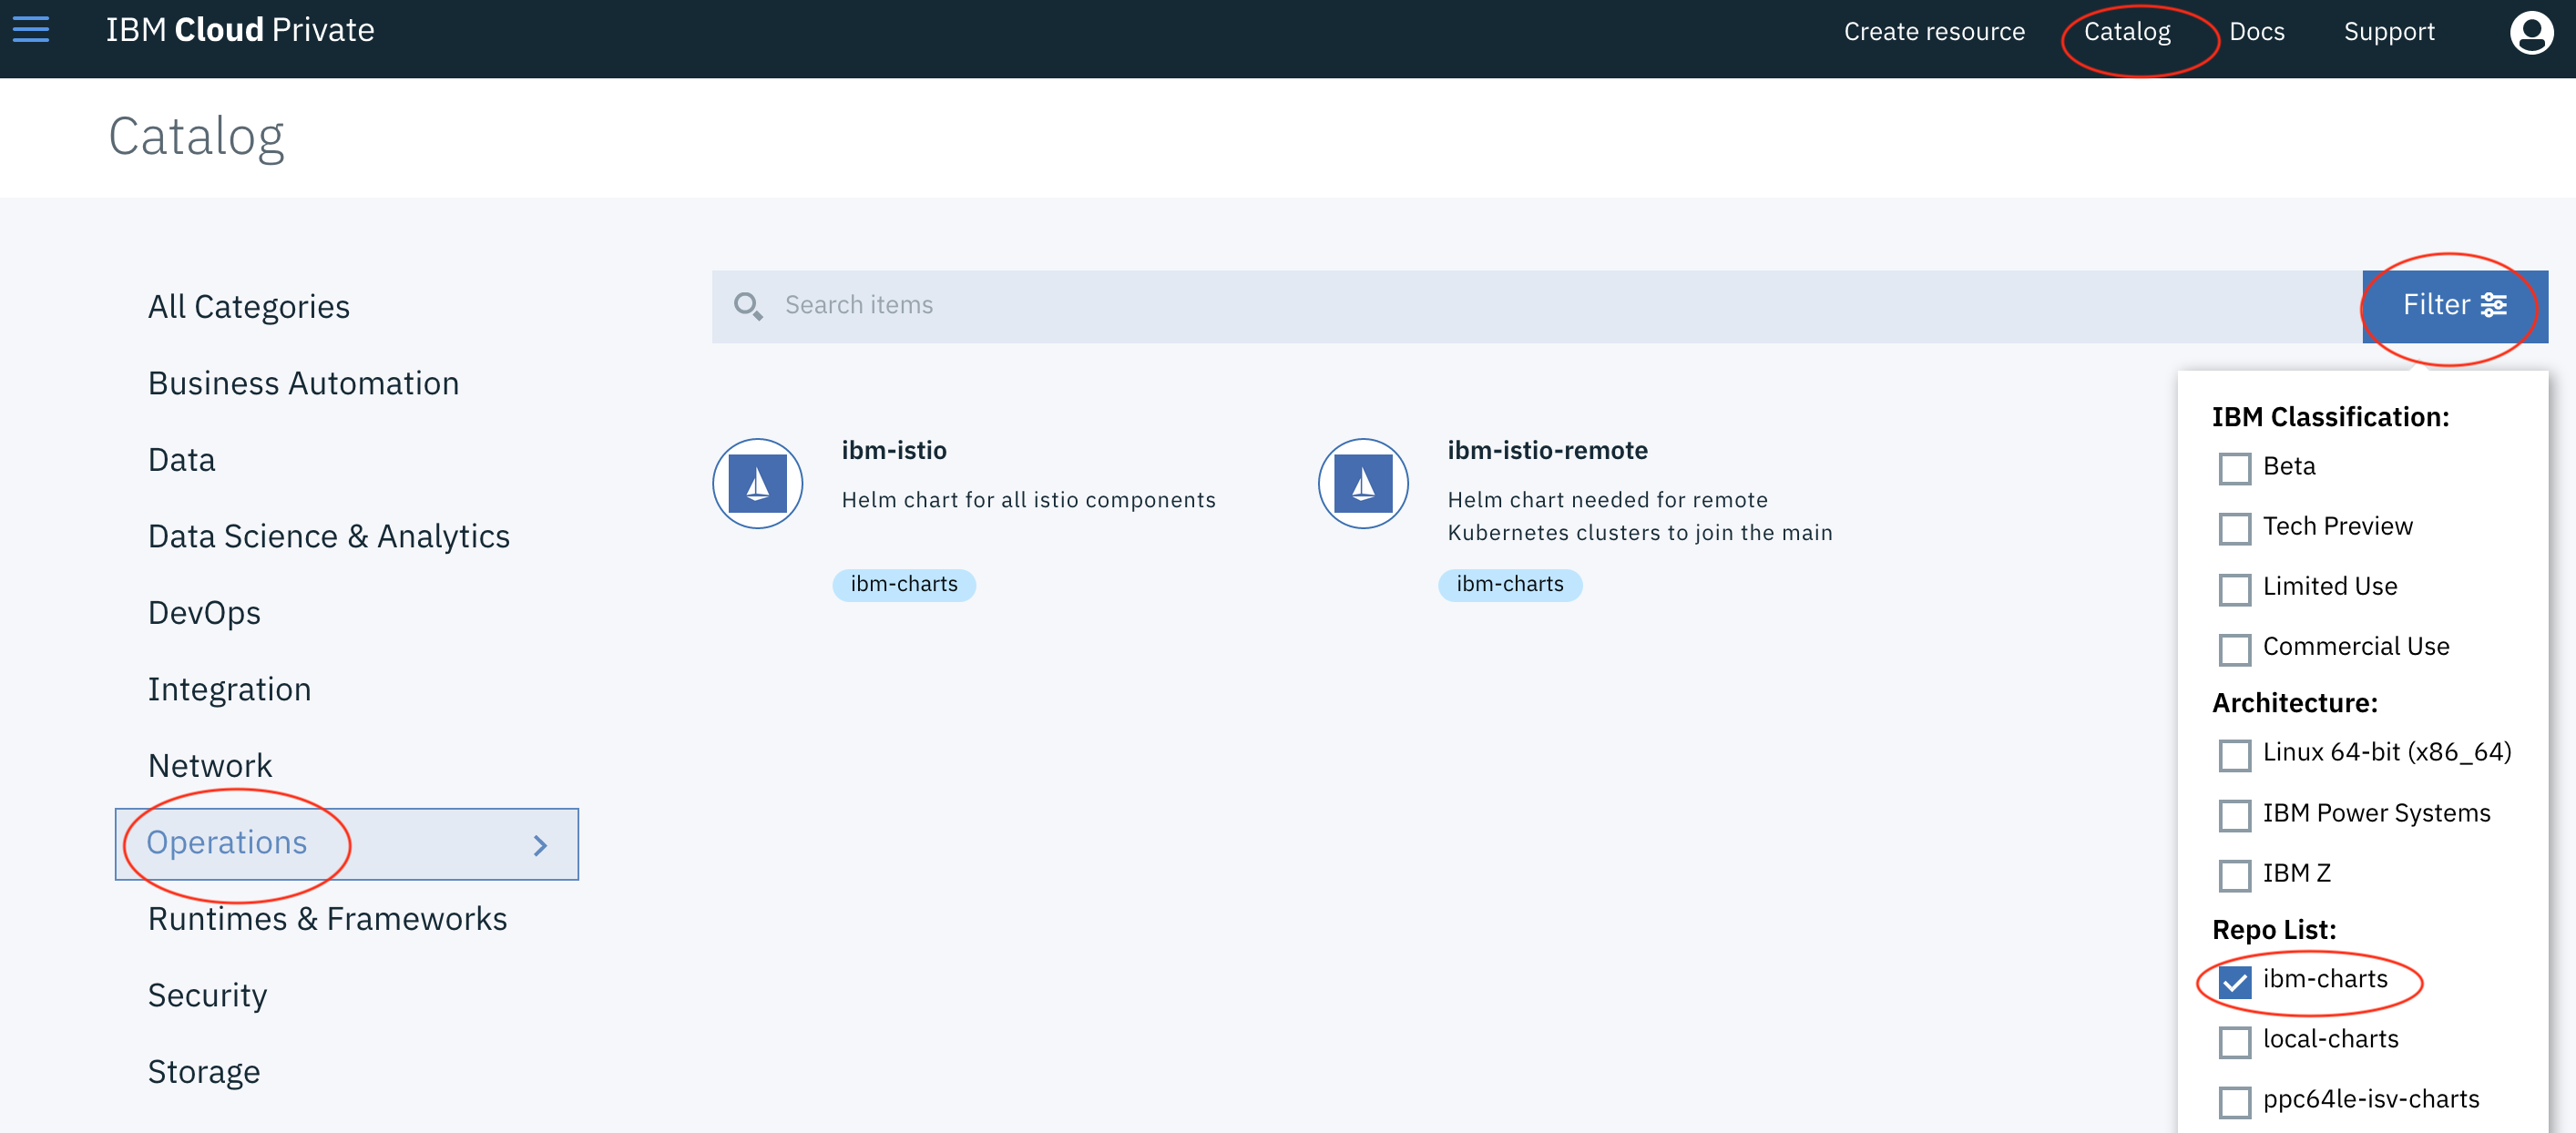
- Click
Catalogon the right side of the navigation bar. - Click
Filteron the right side of the search box and select theibm-chartscheck box. - Click
Operationsin the left navigation pane.
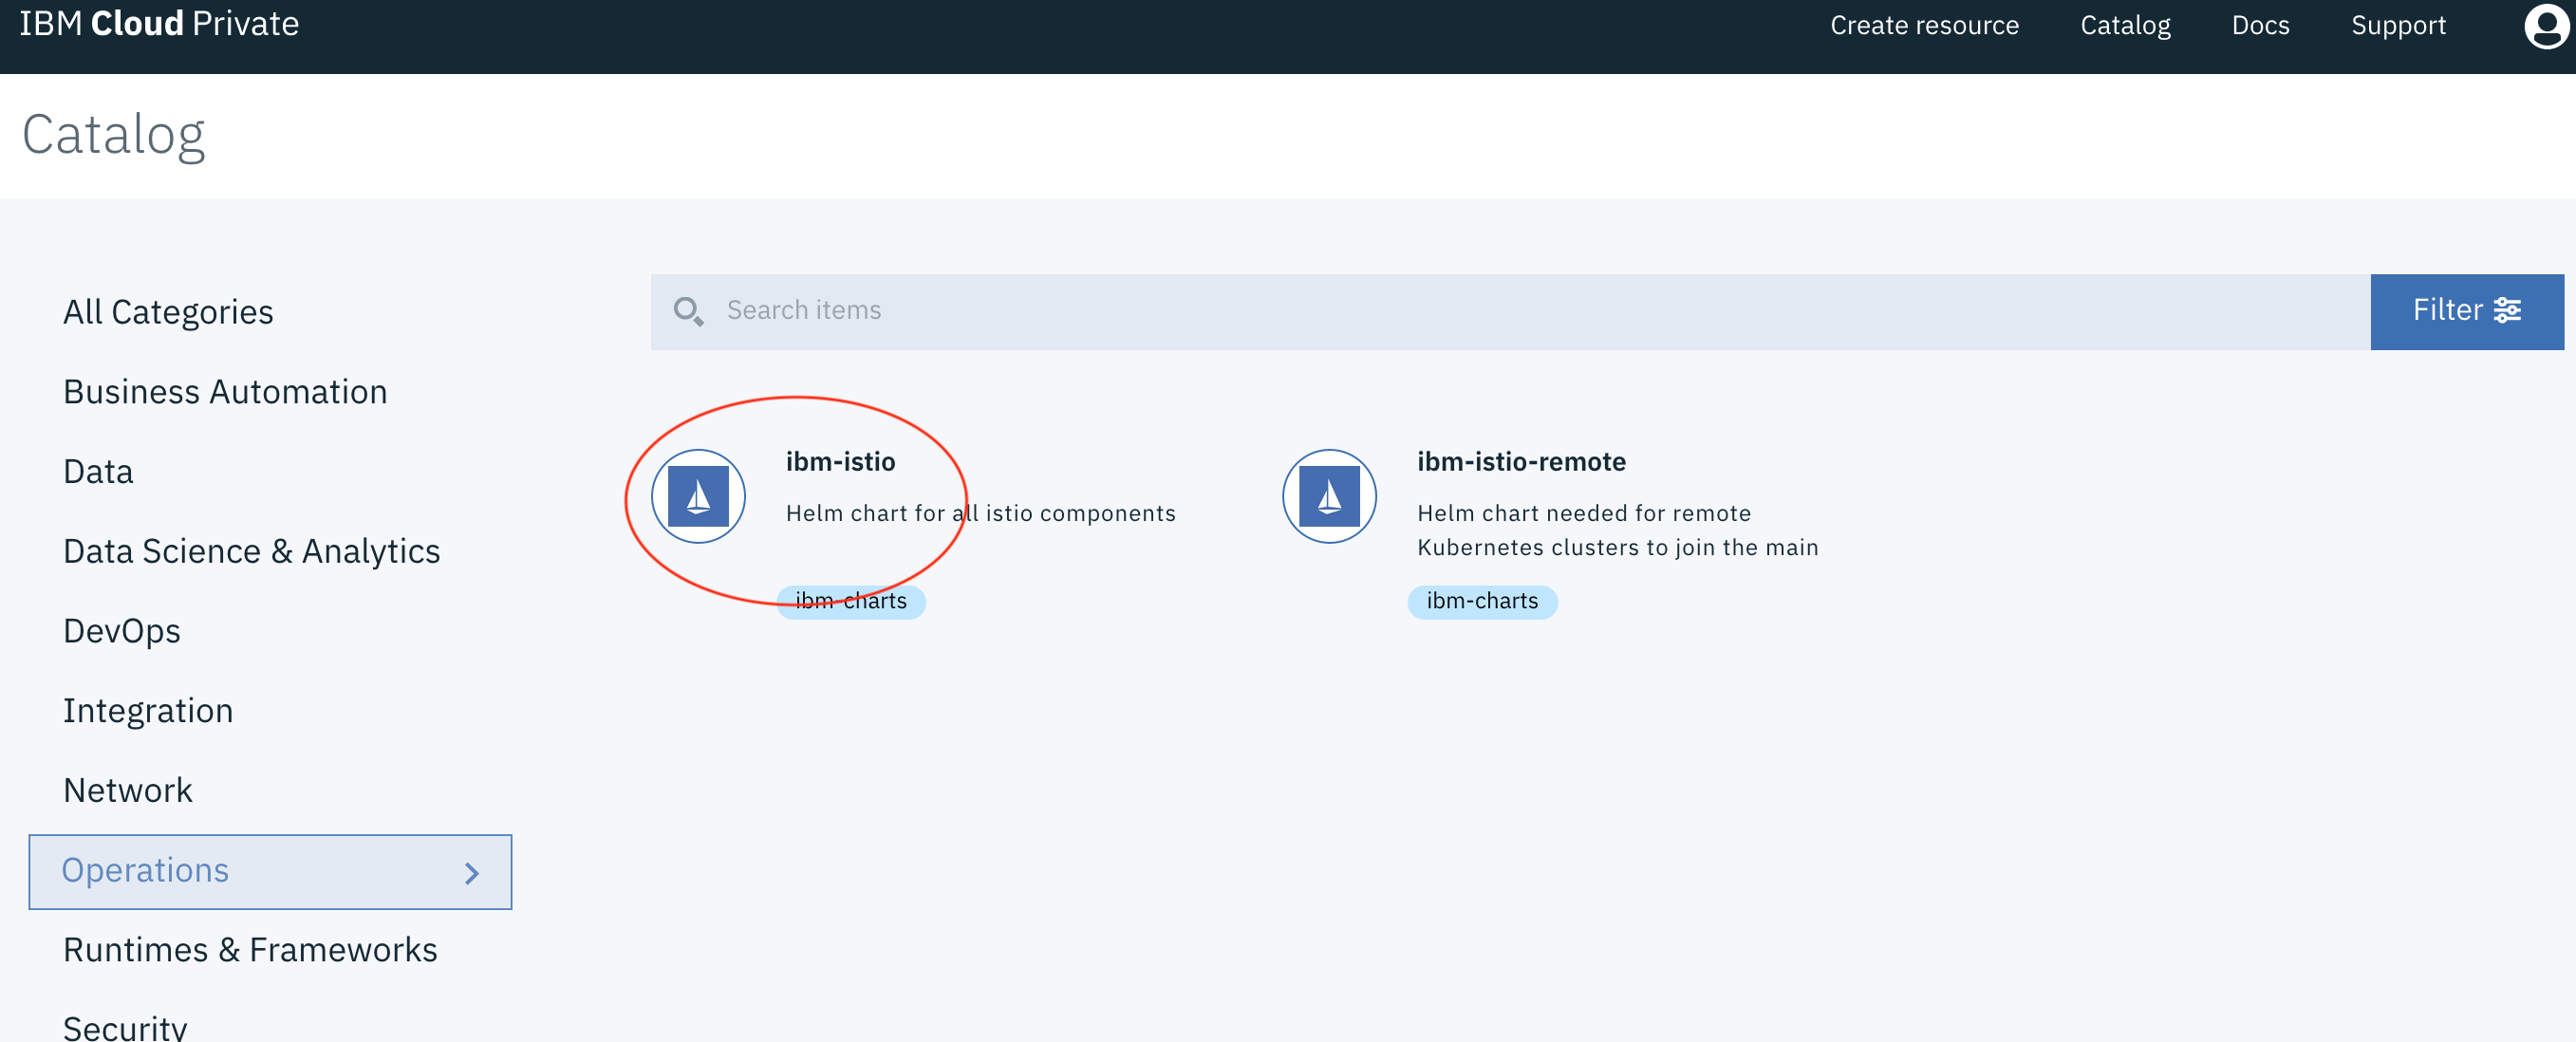
- Click
ibm-istioin the right panel.
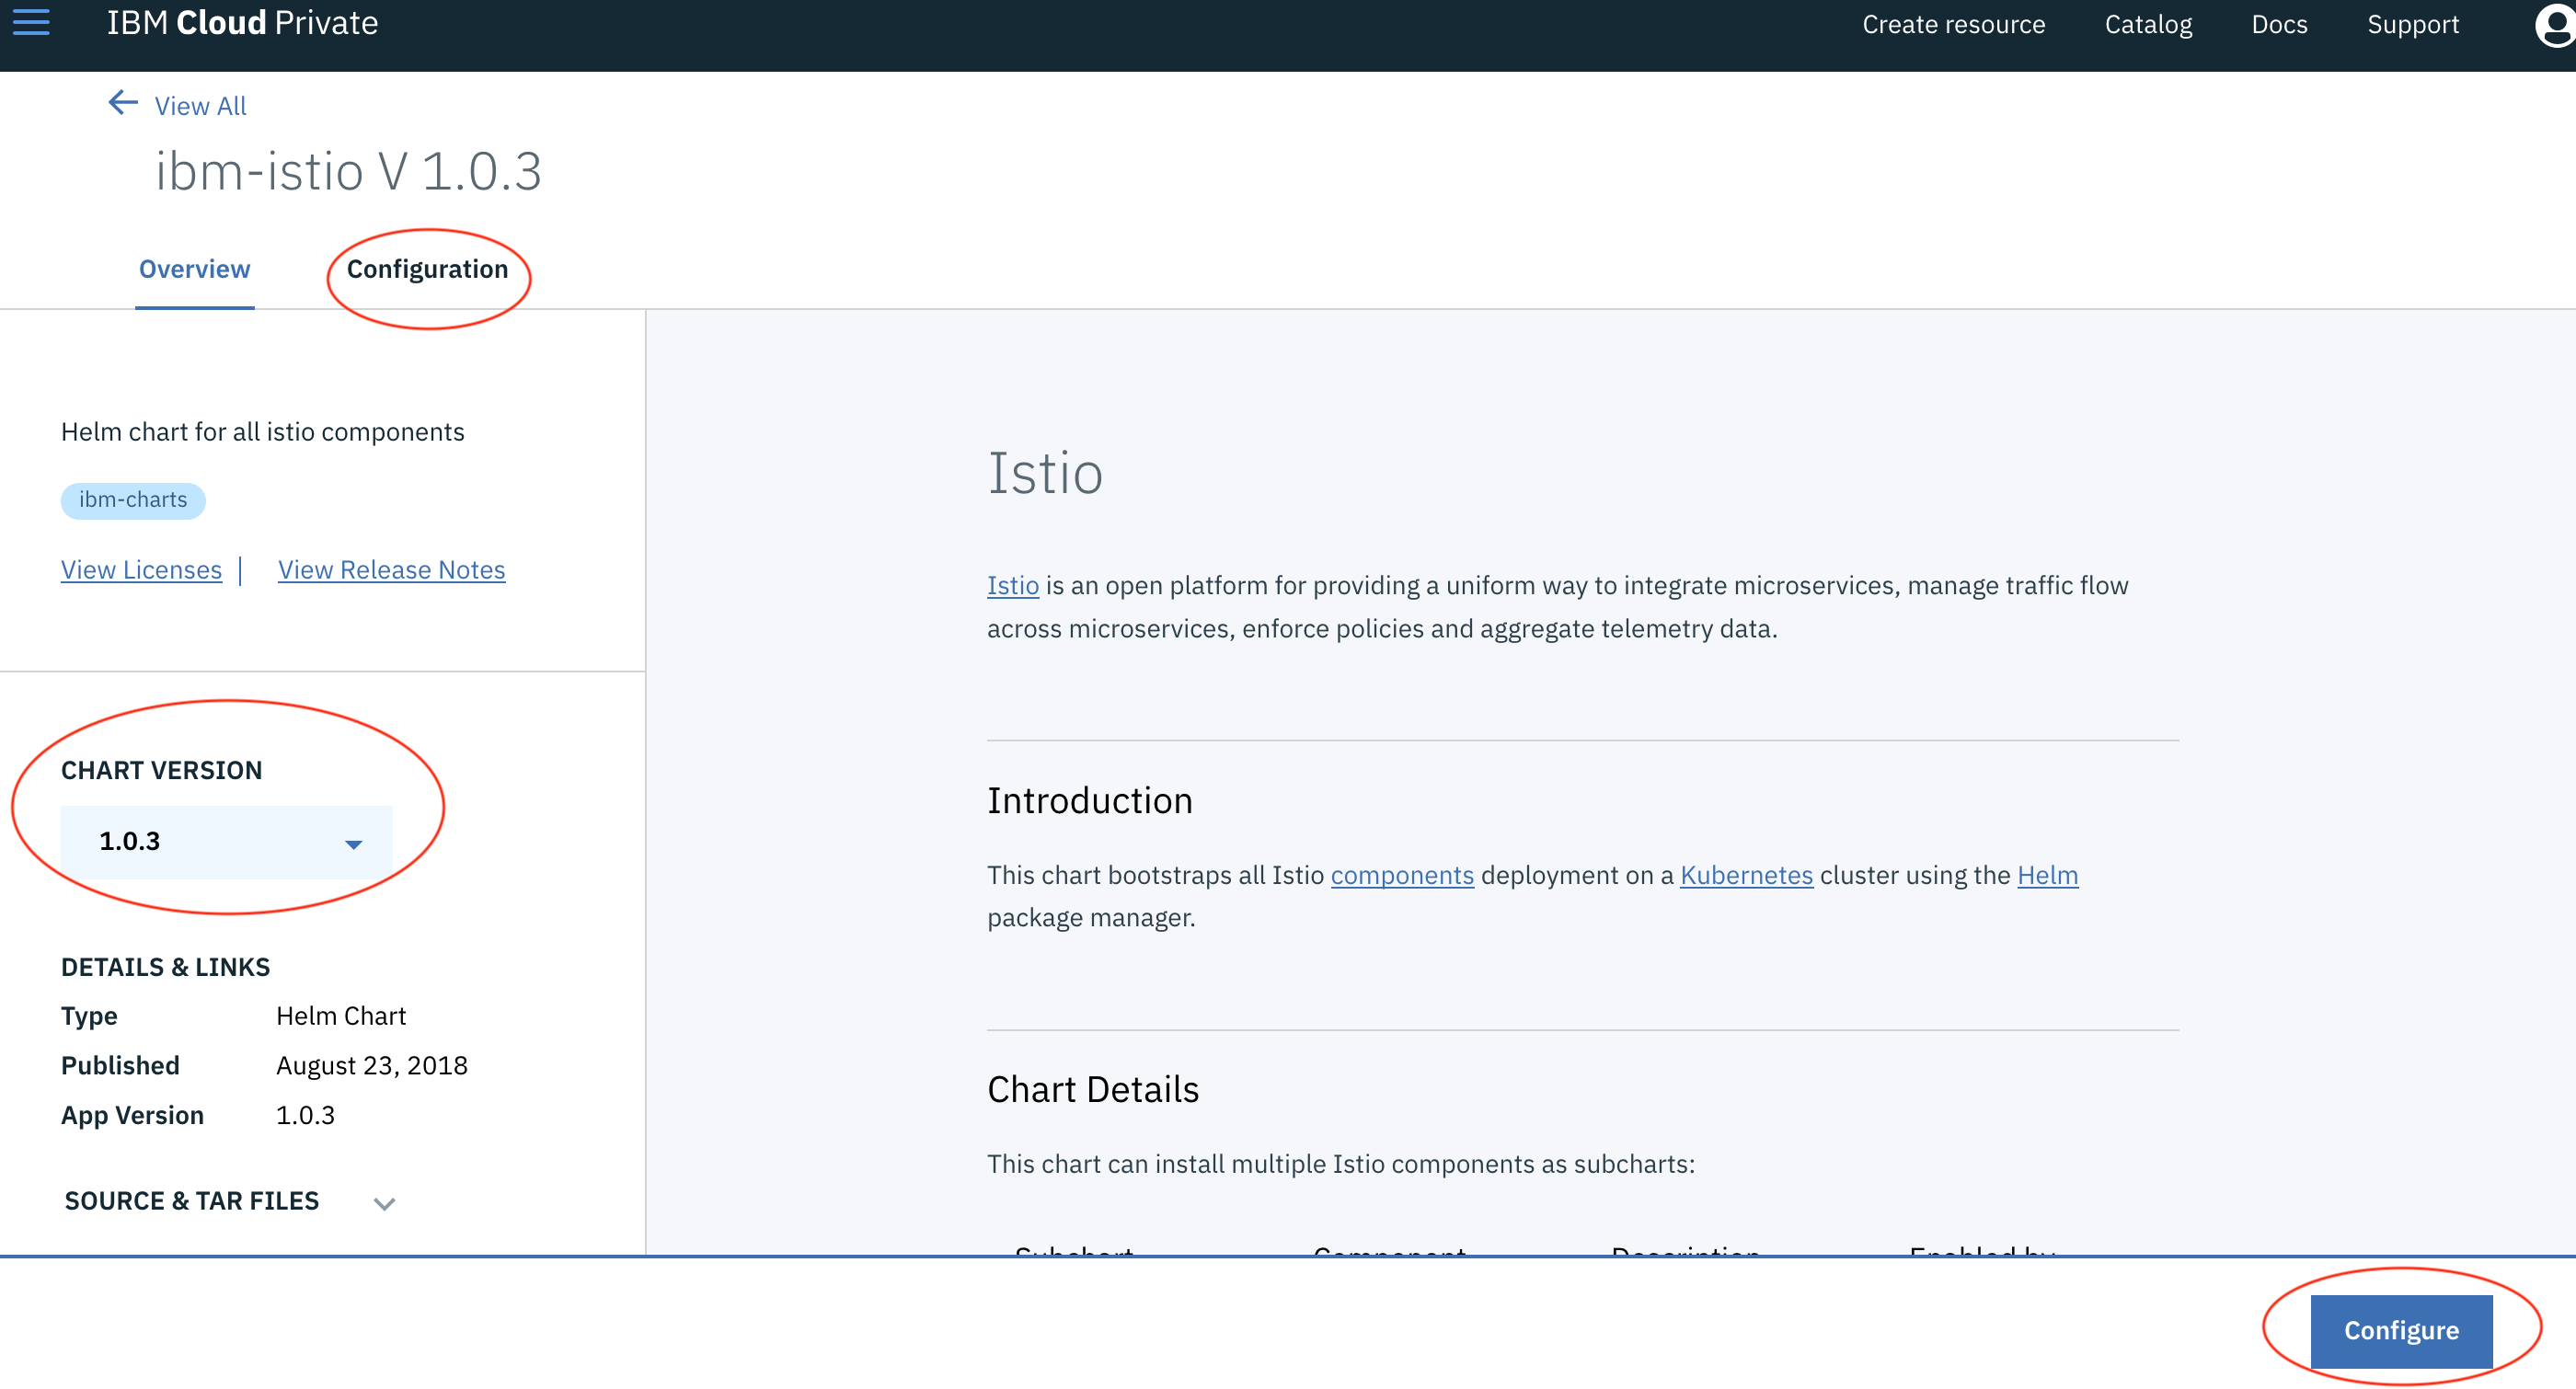
- (Optional) Change the Istio version using the
CHART VERSIONdrop-down. - Click the
Configurebutton.
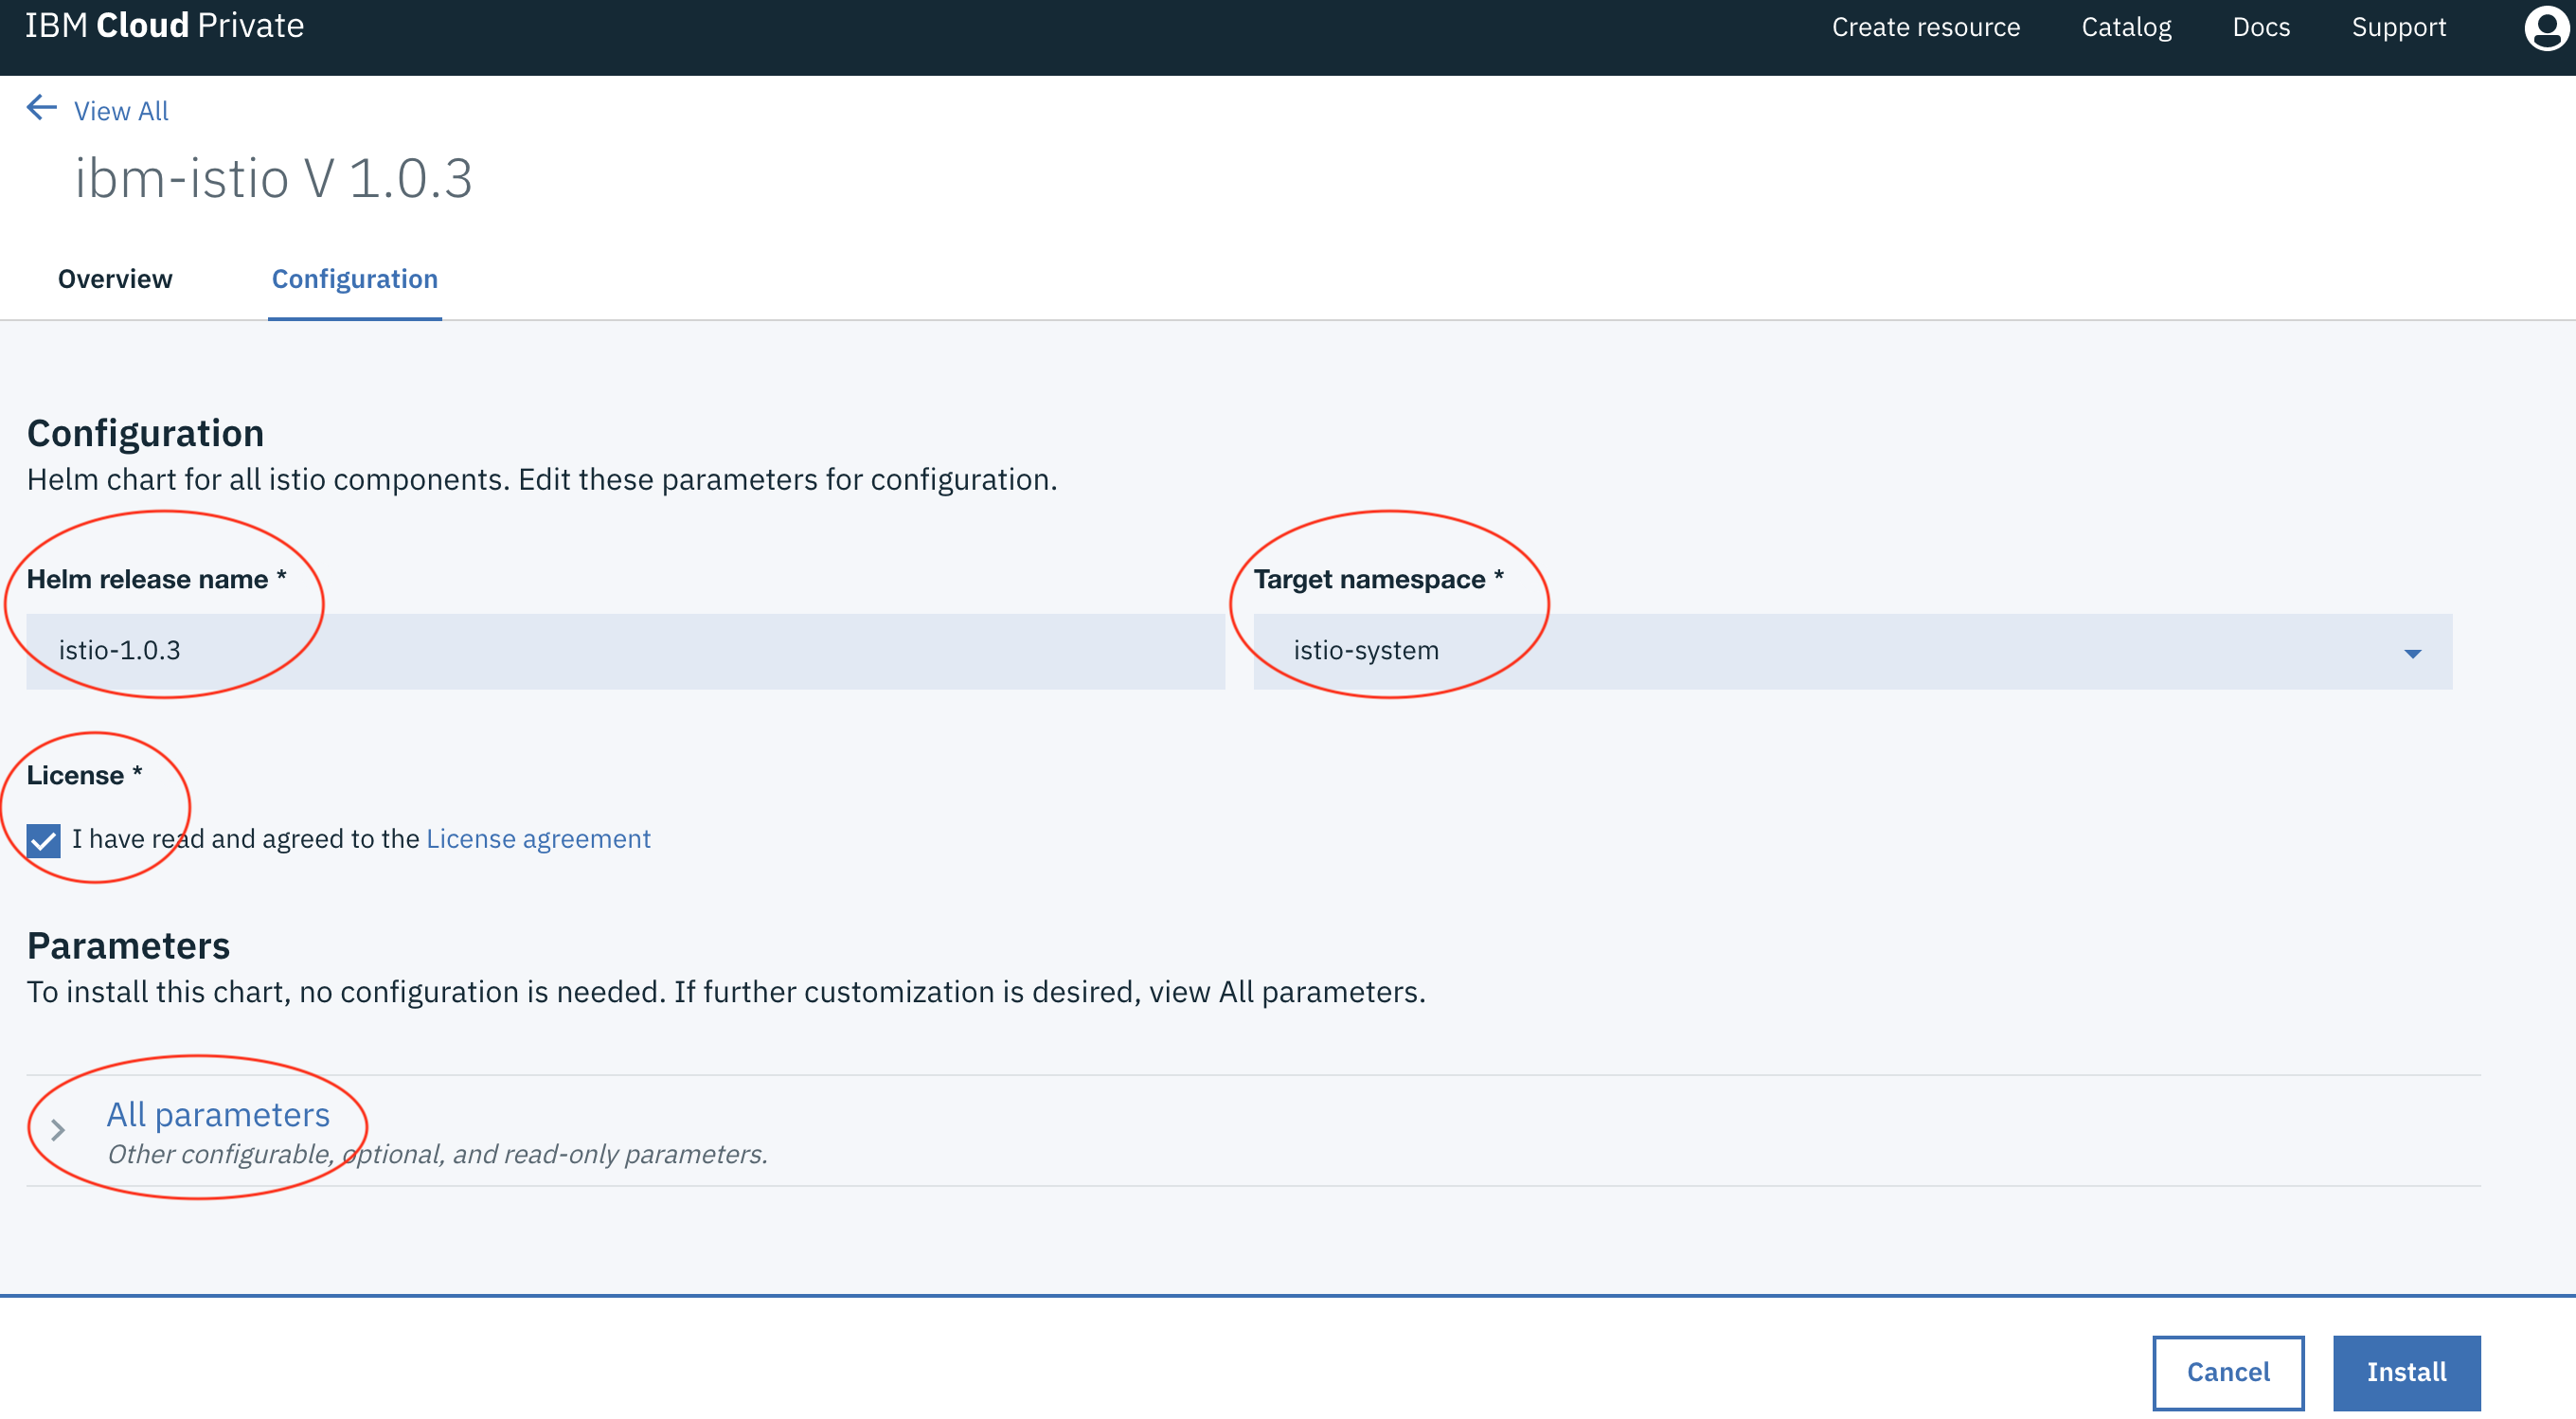
- Input the Helm release name (e.g. istio-1.0.3) and select
istio-systemas the target namespace. - Agree to the license terms.
- (Optional) Customize the installation parameters by clicking
All parameters. - Click the
Installbutton.
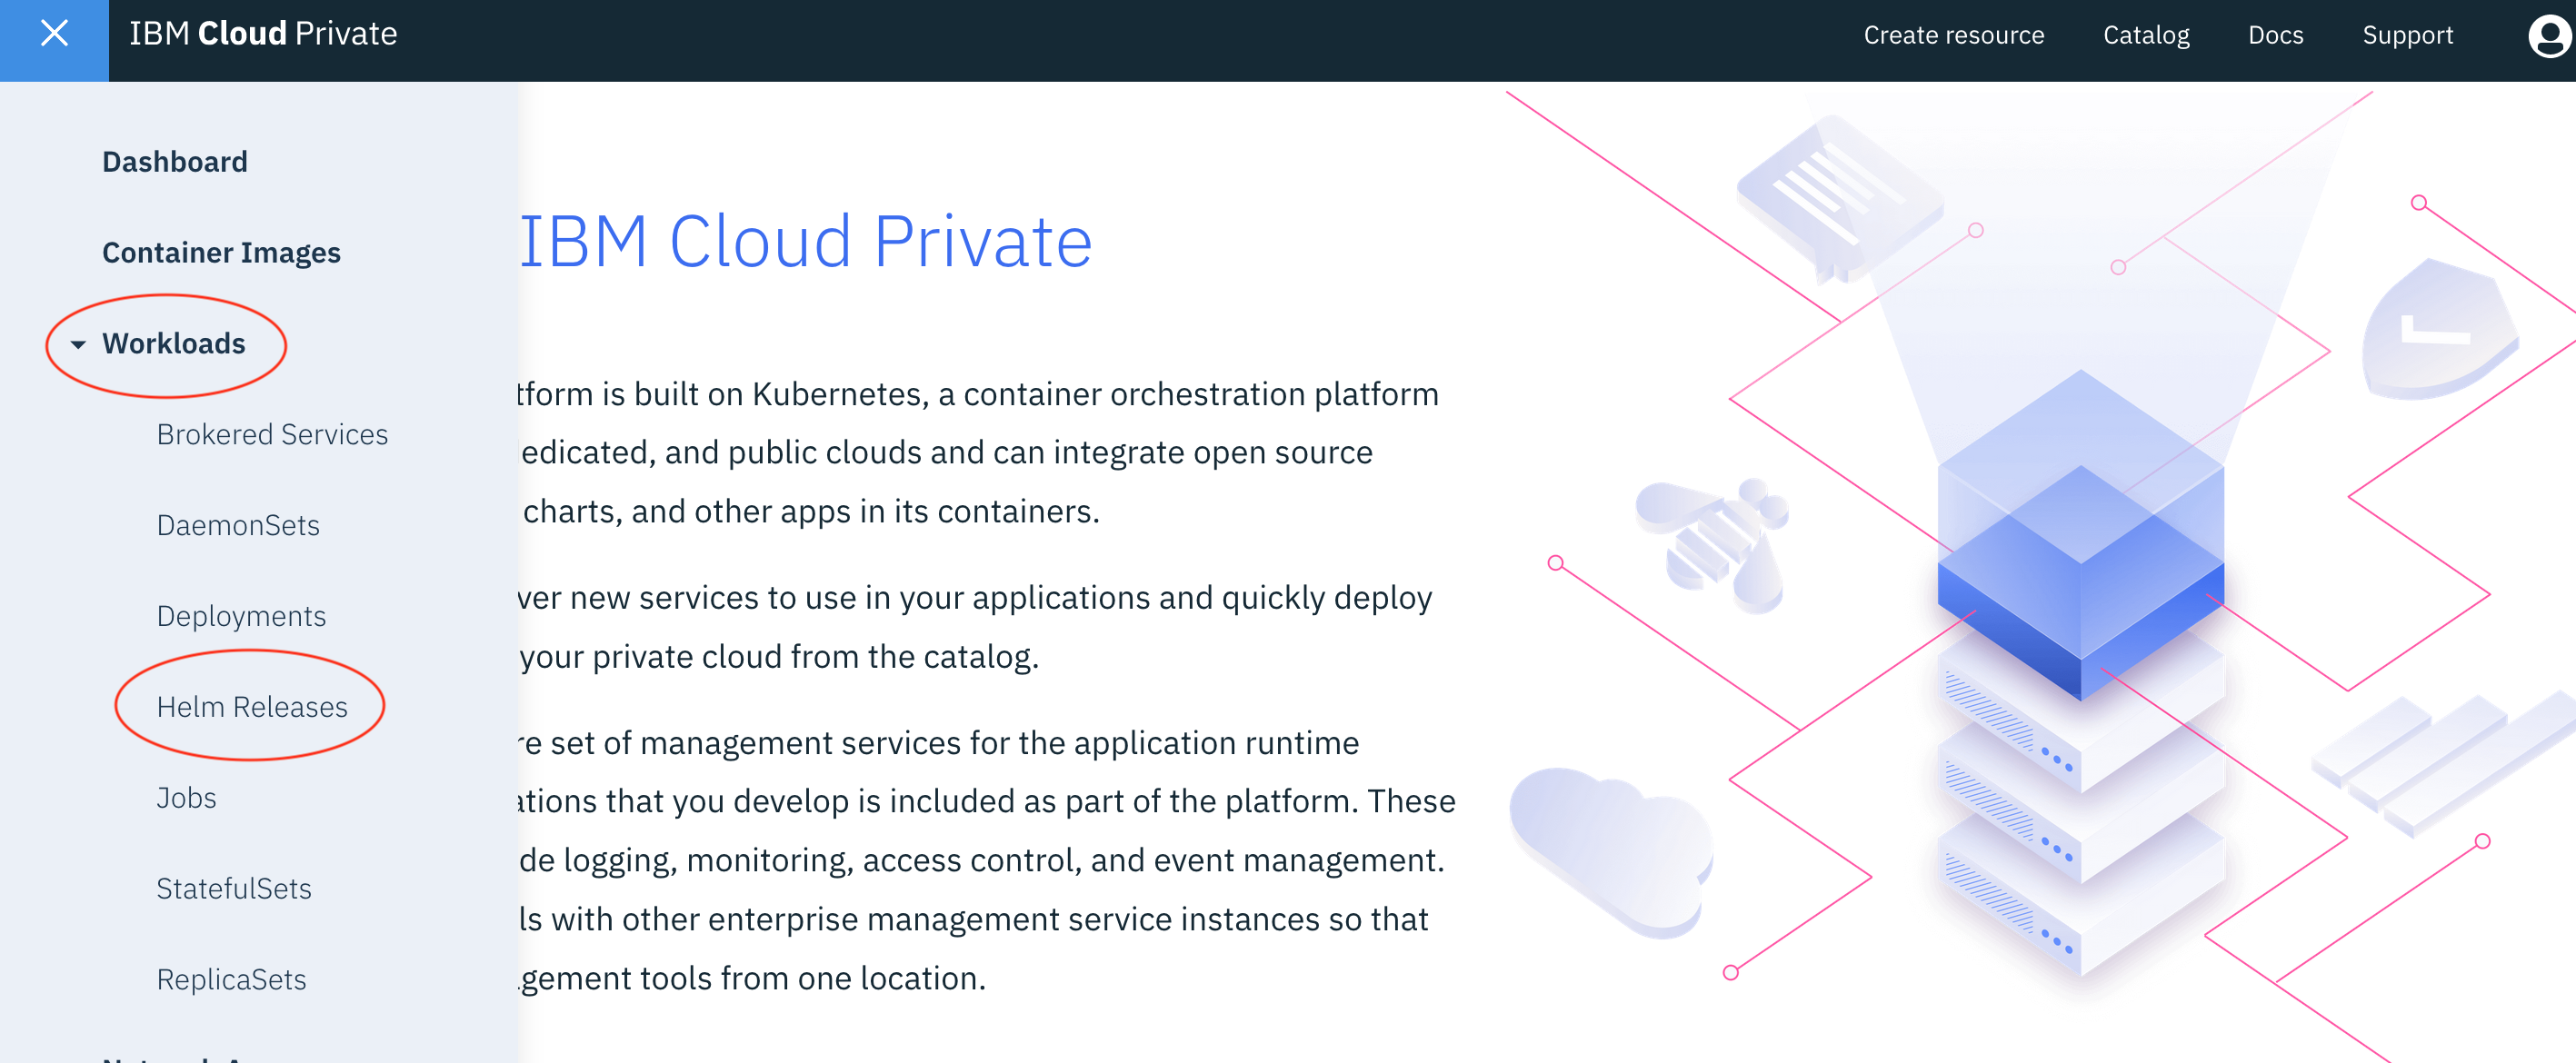
After it is installed, you can find it by searching for its release name on the Helm Releases page.
Upgrade or Rollback
- Log in to the IBM Cloud Private console.
- Click the menu button on the left side of the navigation bar.
- Click
Workloadsand selectHelm Releases. - Find the installed Istio using its release name.
- Click
Actionand selectupgradeorrollback.
Uninstalling
- Log in to the IBM Cloud Private console.
- Click the menu button on the left side of the navigation bar.
- Click
Workloadsand selectHelm Releases. - Find the installed Istio using its release name.
- Click
Actionand selectdelete.
See also
Instructions to download the Istio release.
Instructions to setup a Google Kubernetes Engine cluster for Istio.
Example multicluster GKE install of Istio.
Instructions to setup an IBM Cloud cluster for Istio.
IBM Cloud Kubernetes Service & IBM Cloud Private
Example multicluster between IBM Cloud Kubernetes Service & IBM Cloud Private.
Example multicluster IBM Cloud Private install of Istio.
