Secure and visualize the application
Adding applications to an ambient mesh is as simple as labeling the namespace where the application resides. By adding the applications to the mesh, you automatically secure the communication between them and Istio starts gathering TCP telemetry. And no, you don’t need to restart or redeploy the applications!
Add Bookinfo to the mesh
You can enable all pods in a given namespace to be part of an ambient mesh by simply labeling the namespace:
$ kubectl label namespace default istio.io/dataplane-mode=ambient
namespace/default labeled
Congratulations! You have successfully added all pods in the default namespace to the ambient mesh. 🎉
If you open the Bookinfo application in your browser, you will see the product page, just like before. The difference this time is that the communication between the Bookinfo application pods is encrypted using mTLS. Additionally, Istio is gathering TCP telemetry for all traffic between the pods.
Visualize the application and metrics
Using Istio’s dashboard, Kiali, and the Prometheus metrics engine, you can visualize the Bookinfo application. Deploy them both:
$ kubectl apply -f @samples/addons/prometheus.yaml@
$ kubectl apply -f @samples/addons/kiali.yaml@
You can access the Kiali dashboard by running the following command:
$ istioctl dashboard kialiLet’s send some traffic to the Bookinfo application, so Kiali generates the traffic graph:
$ for i in $(seq 1 100); do curl -sSI -o /dev/null http://localhost:8080/productpage; doneNext, click on the Traffic Graph and select “Default” from the “Select Namespaces” drop-down. You should see the Bookinfo application:
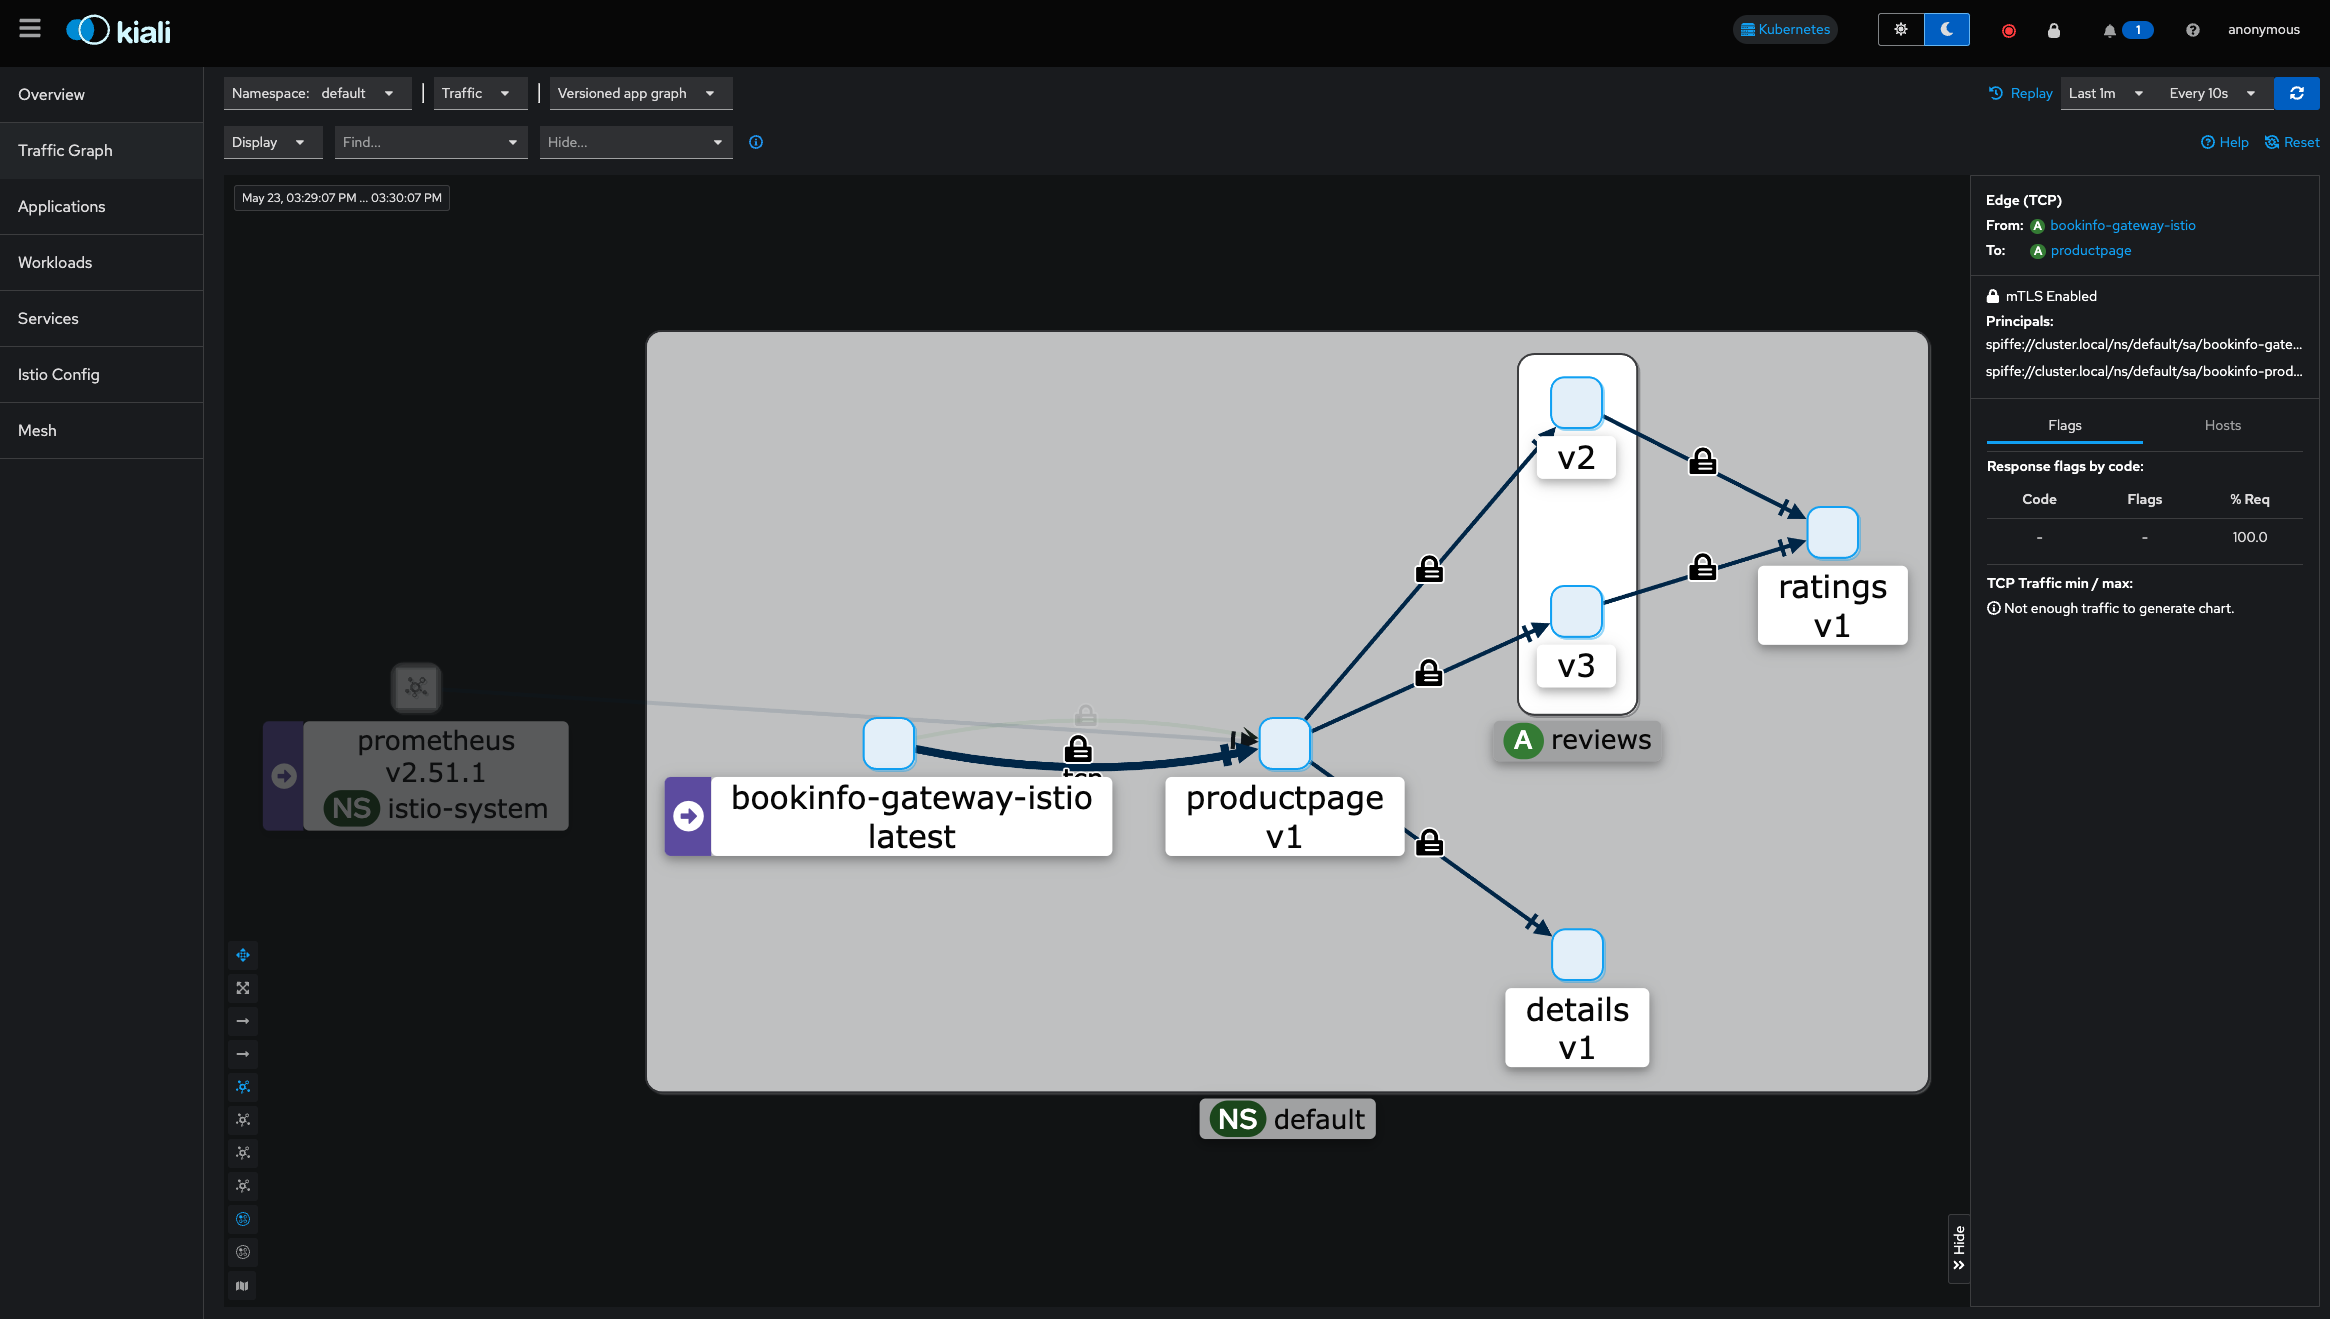
If you click on the line connecting two services on the dashboard, you can see the inbound and outbound traffic metrics gathered by Istio.
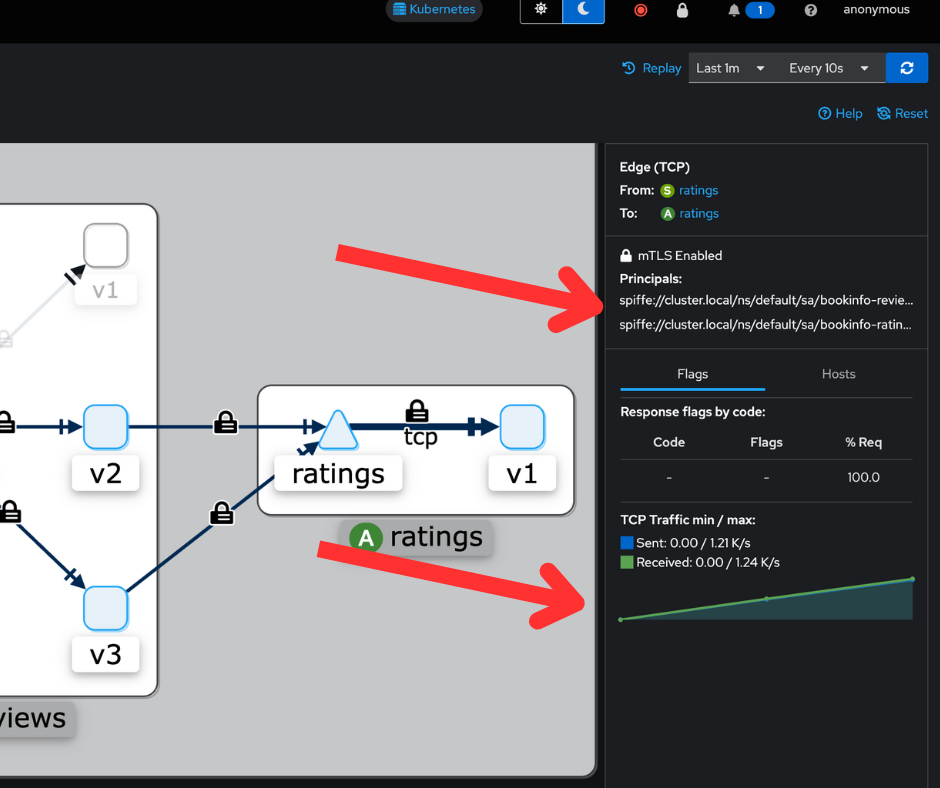
In addition to the TCP metrics, Istio has created a strong identity for each service: a SPIFFE ID. This identity can be used for creating authorization policies.
Next steps
Now that you have identities assigned to the services, let’s enforce authorization policies to secure access to the application.